Easy Buster Bar Ice Cream Dessert Recipe
Buster Bar Ice Cream Dessert is more than just a sweet treat; it’s a nostalgic journey back to carefree summer days and childhood joy. If you, like me, grew up with a deep affection for those iconic chocolate-covered ice cream bars from the ice cream truck, then you’re in for a real delight. This homemade Buster Bar Ice Cream Dessert captures all the magic of the origin extractal, but with the added satisfaction of creating it yourself. What makes this dessert so incredibly special? It’s that perfect symphony of textures and flavors: the rich, creamy vanilla ice cream core, the crunchy peanut-studded chocolate coating, and often, a delightful caramel swirl weaving through it all. It’s an explosion of pure bliss in every bite, and trust me, this Buster Bar Ice Cream Dessert recipe will become your new go-to for impressing guests or simply indulgin extractg in a moment of pure, unadulterated happiness.
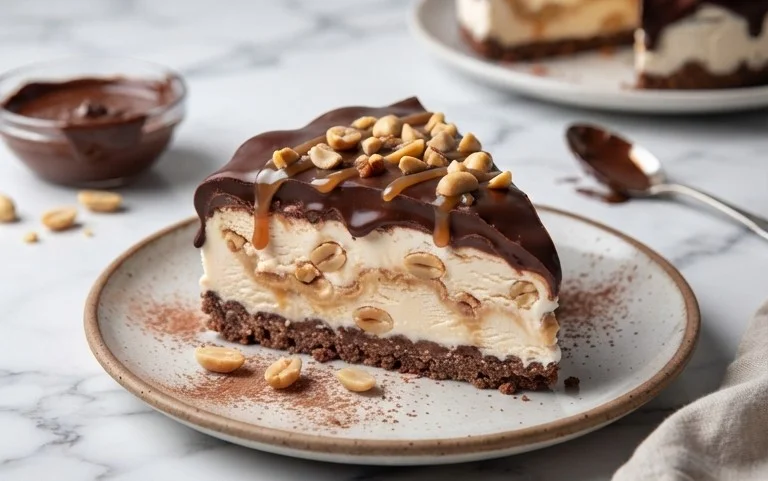
Buster Bar Ice Cream Dessert
Get ready to recreate a beloved frozen treat right in your own kitchen! This Buster Bar Ice Cream Dessert is a nostalgic delight, bringin extractg together the irresistible crunch of Oreos, the smooth creaminess of vanilla ice cream, the satisfying chew of peanuts, and a decadent chocolate shell. It’s surprisingly simple to assemble, making it perfect for a family activity or a show-stopping dessert for your next gathering. Forget the store-bought versions; this homemade rendition is sure to impress and become a new family favorite. We’re going to layer these amazing flavors and textures to create something truly special.
Ingredients:
Assembly and Baking
The first step in creating our Buster Bar masterpiece is to build the foundation. This crunchy Oreo crust is what gives our dessert its delightful texture and chocolatey base. In a medium bowl, combine the crushed Oreo cookies with the melted butter. You want to ensure all the cookie crum extractbs are evenly coated with the butter. A fork or your hands work perfectly for this. The consistency should be like wet sand.
Now, take a 9×13 inch baking dish. Press this Oreo mixture firmly and evenly into the bottom of the dish. This is crucial for creating a solid base that won’t crum extractble when you serve the dessert. Use the bottom of a glass or a flat measuring cup to get a nice, compact layer. Make sure to go all the way to the edges. Once your crust is pressed in, place the dish in the freezer for at least 30 minutes. This will help it firm up while we prepare the next layer.
Next, we prepare the peanut layer. While the Oreo crust is chilling, spread the Spanish peanuts in a single layer on a baking sheet. You’re going to lightly toast these peanuts to enhance their flavor and aroma. Pop them into a preheated oven at 350°F (175°C) for about 5-7 minutes. Keep a close eye on them, as peanuts can burn quickly. You’re looking for a subtle golden hue and a more fragrant smell. Once toasted, let them cool completely.
Now it’s time to add that wonderful layer of vanilla ice cream. Take your softened vanilla ice cream and spread it evenly over the chilled Oreo crust. Make sure to get a consistent layer from edge to edge. If your ice cream is too hard, you can let it sit at room temperature for a bit longer, but you don’t want it to be completely melted. A spatula works well for smoothing the ice cream. Once the ice cream is spread, sprinkle the toasted Spanish peanuts evenly over the top of the ice cream layer. Press them down gently so they adhere to the ice cream. Return the dish to the freezer for another hour, or until the ice cream is firm. This is important to prevent the chocolate from melting too quickly.
The Decadent Chocolate Shell
This is where the magic truly happens – the chocolate shell that encases our Buster Bar. In a medium saucepan over low heat, combine the semi-sweet chocolate chips, the remaining 1/2 cup of butter, and the evaporated milk. Stir constantly. You want this mixture to melt slowly and smoothly. The evaporated milk helps to create a pourable, glossy ganache that hardens beautifully. Be patient and keep stirring. Avoid high heat, as this can cause the chocolate to seize or burn.
Once the chocolate and butter have completely melted and the mixture is smooth and glossy, remove it from the heat. Let it sit for a minute or two to cool slightly. You don’t want it piping hot when you pour it over the frozen ice cream, or it will melt the ice cream too much.
Take your frozen dessert out of the freezer. Carefully and evenly pour the warm chocolate mixture over the peanut and ice cream layer. Use a spatula to spread it gently to cover the entire surface, ensuring there are no gaps. Work quickly but deliberately, as the cold ice cream will start to set the chocolate almost immediately.
Chilling and Serving
Once the chocolate shell is poured, immediately return the dessert to the freezer. You’ll want to let it freeze for at least 4-6 hours, or preferably overnight. This allows the ice cream to completely re-freeze and the chocolate to harden into that classic Buster Bar shell. Patience is key here for the best texture and results.
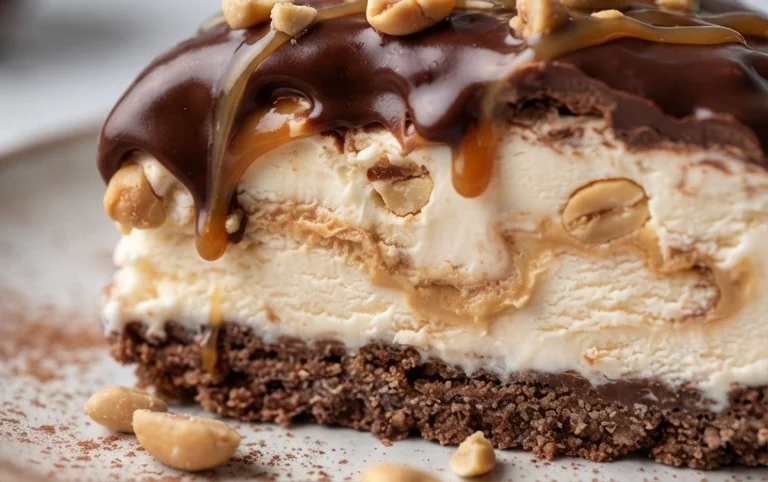
When you’re ready to serve, let the dessert sit at room temperature for about 5-10 minutes before cutting. This will make it easier to slice through the hardened chocolate and frozen ice cream. Use a sharp knife, and cut into desired bar shapes or squares. You can also scoop it directly from the dish like a rich ice cream sundae. Enjoy your homemade Buster Bar Ice Cream Dessert!
Conclusion:
And there you have it – a simple yet incredibly satisfying recipe for Buster Bar Ice Cream Dessert! This dessert truly is a winner because it captures all the nostalgic, craveable elements of the classic treat without the fuss. The combination of creamy ice cream, a crunchy chocolatey shell, and that delightful peanut butter swirl is simply irresistible. It’s perfect for impromptu gatherings, a special family treat, or whenever a serious ice cream craving hits. For serving, consider a drizzle of extra hot fudge or a scattering of chopped peanuts for an added layer of texture and flavor. Don’t be afraid to get creative with variations either! Swap out the vanilla ice cream for chocolate or strawberry, or experiment with different nut butters. The possibilities are endless, and the reward is always delicious. I truly encourage you to give this Buster Bar Ice Cream Dessert a try – I’m confident it will become a new favorite in your dessert rotation!
Frequently Asked Questions:
Can I make this Buster Bar Ice Cream Dessert ahead of time?
Absolutely! The beauty of this dessert is its make-ahead potential. You can assemble the layers and freeze the entire dessert for up to a week. Just let it sit at room temperature for about 10-15 minutes before slicing to make it easier to cut.
What if I don’t have peanut butter? Can I substitute something else?
While peanut butter is key to the classic Buster Bar flavor, you can certainly get creative. Almond butter or even a smooth sunflower seed butter would work well as a substitute for a different nutty profile. For a completely nut-free option, you could try a tahini swirl, though the flavor will be quite different.
How do I get the chocolate shell to be perfectly crunchy?
The key to a great crunchy shell is ensuring your melted chocolate is mixed with a good amount of neutral oil, like vegetable or coconut oil. This helps it stay fluid and thin when it hits the cold ice cream, creating that signature snap. Make sure your ice cream is frozen solid before pouring the chocolate mixture over it.
Buster Bar Ice Cream Dessert
A no-bake ice cream dessert inspired by the classic Buster Bar, featuring layers of crushed Oreos, peanut butter, ice cream, and chocolate.
Ingredients
-
1 14.3 oz pkg. of Oreo cookies, crushed
-
1/2 C butter, melted
-
1/2 gal. vanilla ice cream, softened
-
1 lb. Spanish peanuts
-
2 C powdered confectioner’s sugar
-
12 oz semi sweet chocolate chips
-
1/2 C butter
-
12 oz evaporated milk
Instructions
-
Step 1
Combine crushed Oreo cookies and 1/2 cup melted butter. Press into the bottom of a 9×13 inch pan. -
Step 2
Spread softened vanilla ice cream evenly over the cookie crust. -
Step 3
In a separate bowl, mix together Spanish peanuts, powdered confectioner’s sugar, and 1/2 cup butter until well combined. -
Step 4
Sprinkle the peanut mixture evenly over the ice cream layer. -
Step 5
Melt chocolate chips and evaporated milk in a microwave-safe bowl in 30-second intervals, stirring until smooth. -
Step 6
Drizzle the melted chocolate mixture over the peanut layer. -
Step 7
Freeze for at least 4 hours, or until firm. Cut into bars and enjoy.
Important Information
Nutrition Facts (Per Serving)
It is important to consider this information as approximate and not to use it as definitive health advice.
Allergy Information
Please check ingredients for potential allergens and consult a health professional if in doubt.