Easy Moist Pumpkin Bread Recipe-Quick Bake
Pumpkin bread is more than just a baked good; it’s a warm hug in loaf form, a fragrant promise of cozy autumn days. As the leaves begin extract to turn and the air grows crisp, my kitchen naturally gravitates towards the comforting aroma of spices and sweet pumpkin. There’s something inherently magical about this classic treat that draws us in year after year. Perhaps it’s the perfect balance of sweet, earthy pumpkin and warming spices like cinnamon, nutmeg, and cloves. Or maybe it’s the wonderfully moist and tender crum extractb that melts in your mouth with every bite. This particular pumpkin bread recipe I’m sharing today holds a special place in my heart because it’s incredibly straightforward to make, yet yields results that taste like they came from a professional bakery. It’s the kind of bake that makes you want to gather loved ones, pour a cup of hot cider, and simply savor the season.
Pumpkin Bread
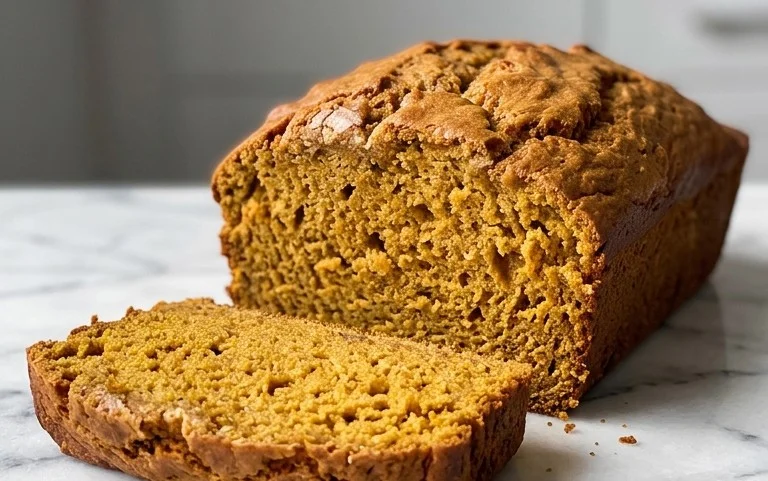
There’s something undeniably comforting about pumpkin bread. The aroma alone can transform a chilly autumn afternoon into a cozy haven, and the taste is pure, spiced sweetness. This recipe is my go-to, a perfect balance of moistness and warm spice that’s incredibly easy to whip up. Whether you’re a seasoned baker or just starting out, you’ll find this pumpkin bread to be a delightful addition to your kitchen repertoire. It’s fantastic for breakfast, as a snack with a cup of tea or coffee, or even as a simple dessert.
Ingredients:
Making Your Delicious Pumpkin Bread
The beauty of this pumpkin bread lies in its simplicity. You won’t need any fancy equipment, just a couple of bowls, a whisk or spatula, and a loaf pan. Let’s get started!
1. Preheat Your Oven and Prepare Your Loaf Pan: The first crucial step is to get your oven to the right temperature and ensure your loaf pan is ready to go. Preheat your oven to 350 degrees Fahrenheit (175 degrees Celsius). This consistent, moderate temperature is key to baking the bread evenly without burning the outside before the inside is cooked through. Next, take your standard 9×5 inch loaf pan. You’ll want to grease it thoroughly. I like to use a combination of butter or cooking spray and then lightly dust it with a bit of flour. This double-layer of protection helps prevent the bread from sticking, making for a clean, beautiful loaf that slides right out. For an extra layer of insurance, you can also line the bottom of the pan with parchment paper, leaving a little overhang on the sides so you can easily lift the bread out once it’s baked.
2. Whisk Together Your Dry Ingredients: In a large mixing bowl, combine all of your dry ingredients. This includes the 1 3/4 cups of all-purpose flour, 1 tablespoon of pumpkin pie spice (which is a wonderful blend of cinnamon, nutmeg, gin extractger, and cloves, providing that signature fall flavor), 1 teaspoon of baking soda, 1 teaspoon of ground cinnamon for an extra punch of spice, 1/2 teaspoon of baking powder for lift, and 3/4 teaspoon of fine sea salt to balance the sweetness and enhance all the flavors. It’s important to whisk these ingredients together thoroughly. This ensures that the leavening agents (baking soda and baking powder) and the spices are evenly distributed throughout the flour. This step prevents pockets of baking soda or clumps of spice in your finished bread, resulting in a uniform texture and flavor.
3. Combine Your Wet Ingredients: In a separate medium-sized bowl, we’ll bring together the wet ingredients that will give our pumpkin bread its moisture and richness. Add the 1 cup of pumpkin purée. Make sure you’re using pure pumpkin purée, not pumpkin pie filling, as the latter already contains added sugar and spices. Next, pour in the 1/2 cup of melted butter, which adds a lovely richness and tenderness. Then, crack in your 2 large eggs. Eggs act as a binder and add to the structure of the bread. Finally, add the 1 teaspoon of vanilla extract. Vanilla is a flavor enhancer that complements the pumpkin and spices beautifully. Whisk these wet ingredients together until they are well combined and smooth.
4. Marry the Wet and Dry Ingredients: Now it’s time to bring the two mixtures together. Pour the wet ingredients into the bowl with the dry ingredients. Add both the 1 cup of granulated white sugar and the 1/2 cup of packed light brown sugar to the wet ingredients before combining them with the dry. The sugars add sweetness and moisture. I often like to whisk the granulated and brown sugars into the wet ingredients first, ensuring they are fully incorporated before combining everything. This helps the sugars dissolve and distribute more evenly. Once the wet ingredients are in the dry, use your whisk or spatula to gently mix everything until just combined. It’s crucial not to overmix at this stage. Overmixing can develop the gluten in the flour too much, leading to a tough and dense bread. A few streaks of flour are perfectly fine; they will disappear as the bread bakes.
5. Bake to Golden Perfection: Pour the batter evenly into your prepared loaf pan. You can use a spatula to scrape out every last bit from the bowl – no need to waste that deliciousness! Place the loaf pan in the preheated oven on the center rack. Bake for 50 to 65 minutes. The exact baking time will vary depending on your oven, so it’s important to keep an eye on it. You’ll know the pumpkin bread is ready when a wooden skewer or toothpick inserted into the center comes out clean, with no wet batter attached. The top should be a beautiful golden brown, and the edges should be pulling away slightly from the sides of the pan. If you notice the top browning too quickly before the inside is cooked, you can loosely tent the pan with aluminum foil for the remainder of the baking time.
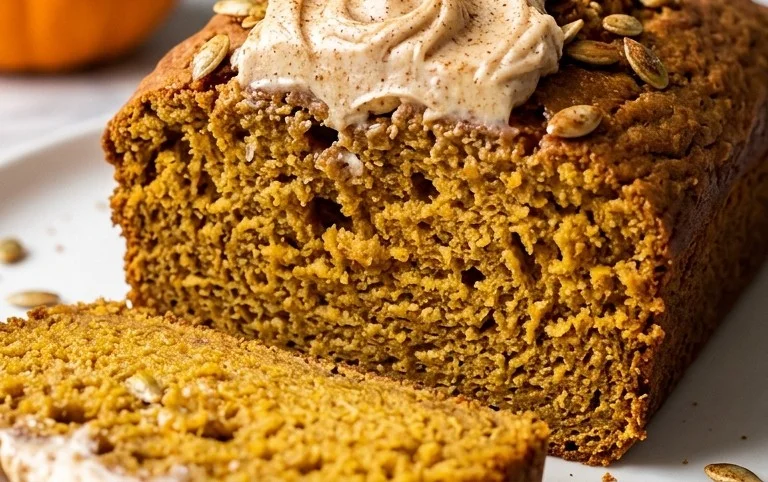
6. Cool and Enjoy: Once your pumpkin bread is baked, carefully remove it from the oven. Let it cool in the loaf pan for about 10 to 15 minutes. This allows it to set up a bit more, making it easier to remove without it falling apart. After this initial cooling period, carefully invert the pan onto a wire rack to release the loaf. If you used parchment paper, you can use the overhang to help lift it out. Let the bread cool completely on the wire rack before slicing. This is probably the hardest part – waiting for that irresistible aroma to dissnon-alcoholic ipate before you can dig in! Once completely cooled, slice it with a serrated knife for the cleanest cuts. Enjoy your homemade pumpkin bread plain, toasted, or with a smear of butter or cream cheese. It stores well in an airtight container at room temperature for a few days, or you can freeze slices for later enjoyment.
Conclusion:
I hope you’re as excited as I am to bake this delicious pumpkin bread! This recipe is a true winner because it consistently delivers a moist, flavorful loaf with that perfect touch of spice. It’s incredibly versatile, making it a fantastic option for a quick breakfast, a satisfying snack, or even a delightful dessert. The aroma that fills your kitchen while it bakes is simply divine, and the taste is pure autumnal comfort. Don’t hesitate to give it a try; you won’t be disappointed!
Serving this pumpkin bread is a joy. It’s wonderful on its own, but for an extra treat, try it warm with a smear of butter, cream cheese, or even a drizzle of honey. For variations, feel free to stir in a handful of chocolate chips, chopped pecans, or walnuts for added texture and flavor. You could also experiment with different spice blends, adding a pinch of nutmeg or cloves for a deeper autumnal profile. This recipe is a perfect canvas for your creativity!
Frequently Asked Questions:
Why is my pumpkin bread dry?
Dry pumpkin bread often results from over-mixing the batter, which can develop the gluten too much, or over-baking. Ensure you only mix until the dry ingredients are just combined. For baking, use a toothpick inserted into the center to check for doneness – it should come out with moist crum extractbs, not completely clean. Also, make sure you’re using pumpkin puree, not pumpkin pie filling.
Can I make this pumpkin bread vegan?
Absolutely! To make this recipe vegan, simply substitute the eggs with a flax egg (1 tablespoon ground flaxseed mixed with 3 tablespoons water, let sit for 5 minutes) or a commercial egg replacer. For the dairy, you can use plant-based milk like almond or oat milk and a dairy-free butter or oil.
How do I store pumpkin bread?
Once cooled, you can store your pumpkin bread at room temperature in an airtight container for up to 3 days. For longer storage, wrap it tightly in plastic wrap and then foil, and it will keep in the refrigerator for about a week. You can also freeze slices or the whole loaf, tightly wrapped, for up to 3 months. Thaw at room temperature or gently reheat slices.
Pumpkin Bread
A moist and flavorful pumpkin bread, perfect for a fall treat or any time of year. This recipe uses common pantry staples and warming spices.
Ingredients
-
1 3/4 cups all-purpose flour
-
1 tablespoon pumpkin pie spice
-
1 teaspoon baking soda
-
1 teaspoon ground cinnamon
-
1/2 teaspoon baking powder
-
3/4 teaspoon fine sea salt
-
1 cup granulated white sugar
-
1/2 cup packed light brown sugar
-
1/2 cup melted butter
-
1 cup pumpkin purée
-
2 large eggs
-
1 teaspoon vanilla extract
Instructions
-
Step 1
Preheat oven to 350°F (175°C). Grease and flour a 9×5 inch loaf pan. -
Step 2
In a large bowl, whisk together the flour, pumpkin pie spice, baking soda, cinnamon, baking powder, and salt. -
Step 3
In a separate medium bowl, whisk together the granulated sugar, brown sugar, melted butter, pumpkin purée, eggs, and vanilla extract until well combined. -
Step 4
Pour the wet ingredients into the dry ingredients and stir until just combined. Do not overmix. -
Step 5
Pour the batter into the prepared loaf pan and spread evenly. -
Step 6
Bake for 55-65 minutes, or until a wooden skewer inserted into the center comes out clean. -
Step 7
Let the bread cool in the pan for 10 minutes before inverting it onto a wire rack to cool completely.
Important Information
Nutrition Facts (Per Serving)
It is important to consider this information as approximate and not to use it as definitive health advice.
Allergy Information
Please check ingredients for potential allergens and consult a health professional if in doubt.