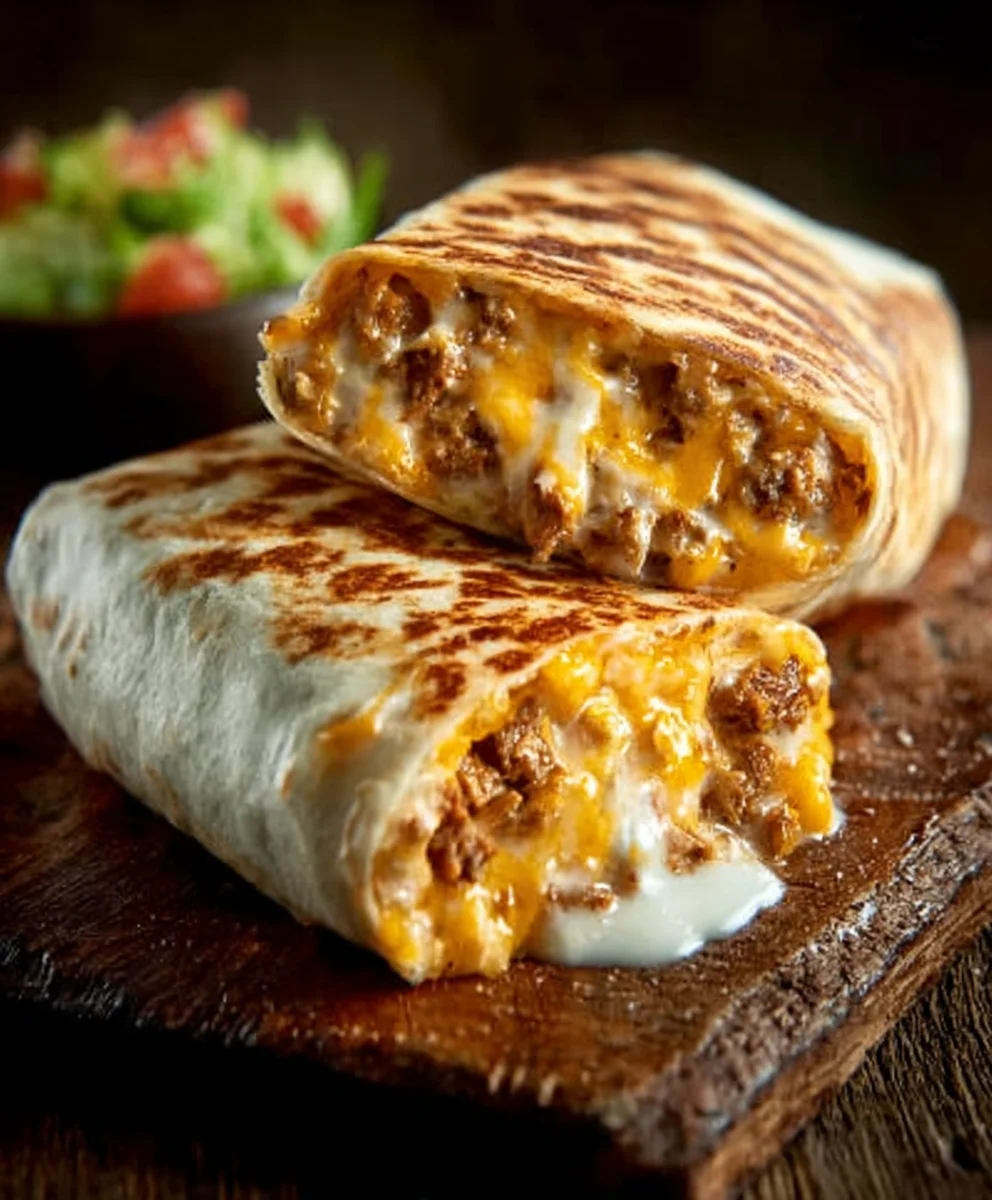
Grilled Cheese Burrito- Ultimate Cheesy Flavor Explosion
Grilled Cheese Burrito. Oh yes, you read that right. Imagin extracte all the gooey, cheesy, buttery goodness of your favorite childhood comfort food, but elevated into a handheld, satisfying burrito that’s perfect for lunch, dinner, or even a decadent breakfast. It’s a concept that sounds almost too good to be true, but trust me, it’s a culinary revelation. We love this dish because it taps into that universal craving for comfort and flavor, offering a delightful twist on familiar favorites. What makes the Grilled Cheese Burrito so special is its ingenious fusion of textures and tastes: the crisp, golden-brown tortilla giving way to a molten core of melty cheese, often enhanced with savory additions that take it from simple to spectacular. This isn’t just a sandwich in a tortilla; it’s a symphony of crunchy, chewy, and creamy notes that will have you coming back for more.

Ingredients:
- 1 pound ground beef
- 1 packet taco seasoning (or your favorite homemade blend)
- 1 cup cooked white rice
- 1/2 cup sour cream
- 1/2 cup nacho cheese sauce
- 1/4 cup chipotle sauce
- 1 cup shredded cheddar cheese
- 1 cup shredded mozzarella cheese
- 4 large flour tortillas
- Butter or cooking oil for grilling
Preparing the Ground Beef Filling
Step 1: Brown the Ground Beef
Begin extract by placing the 1 pound of ground beef into a large skillet over medium-high heat. As the beef starts to cook, break it apart with a spoon or spatula into smaller crum extractbles. Continue to cook, stirring occasionally, until the beef is fully browned and no pink remains. This typically takes about 8-10 minutes. Once browned, carefully drain off any excess grease from the skillet. A well-drained beef base will prevent your Grilled Cheese Burrito from becoming greasy.
Step 2: Season the Beef
After draining the grease, add the entire packet of taco seasoning to the skillet with the browned ground beef. If you’re using a homemade taco seasoning, now is the time to add your preferred blend. Stir the seasoning thoroughly into the beef, ensuring every piece is coated. Cook for another 1-2 minutes, stirring constantly, allowing the flavors of the taco seasoning to bloom and meld with the beef. This step is crucial for developing a rich, savory flavor profile for your burrito filling.
Assembling the Burrito Filling
Step 3: Combine Filling Ingredients
Once the beef is seasoned, reduce the heat to low. Add the 1 cup of cooked white rice to the skillet. Stir gently to combine it with the seasoned ground beef. Next, incorporate the 1/2 cup of sour cream, 1/2 cup of nacho cheese sauce, and 1/4 cup of chipotle sauce. Mix everything together until it’s well combined and creamy. The sour cream and sauces will create a wonderfully cohesive and flavorful filling that binds the ingredients together. Taste and adjust seasoning if needed, though the taco seasoning usually provides ample flavor.
Building and Grilling the Grilled Cheese Burrito
Step 4: Assemble the Tortillas
Lay out one of your 4 large flour tortillas on a clean, flat surface. Spoon a generous portion of the beef and rice mixture onto the center of the tortilla, leaving about an inch of space around the edges. Sprinkle about 1/2 cup of the shredded cheddar cheese and 1/2 cup of the shredded mozzarella cheese over the beef mixture. You can adjust the cheese quantity to your preference, but this amount provides a great cheesy pull. Fold in the sides of the tortilla first, then tightly roll up the bottom, tucking the filling in as you go, to form a burrito shape. Repeat this process for the remaining three tortillas.
Step 5: Grill to Golden Perfection
Heat a large skillet or griddle over medium heat. Add a tablespoon of butter or cooking oil to the hot surface. Carefully place two of your assembled burritos seam-side down onto the skillet. Cook for about 3-5 minutes per side, or until the tortillas are golden brown and crispy, and the cheese inside is wonderfully melted and gooey. You’ll know they’re ready when they have a satisfying crunch and the cheese is oozing out slightly. Use a spatula to gently flip them to ensure even browning on all sides. Once cooked, remove them from the skillet and set them aside while you grill the remaining two burritos, adding more butter or oil to the skillet as needed. For an extra cheesy experience, you can even sprinkle a little more cheese on the outside of the tortilla before grilling.
Conclusion:
And there you have it – your very own delicious Grilled Cheese Burrito! This recipe is a fantastic fusion of comfort food classics, bringin extractg together the gooey, cheesy goodness of grilled cheese with the convenient, portable nature of a burrito. It’s surprisingly simple to make but delivers a burst of flavor and satisfying texture that will have you craving it again and again. We hope you enjoyed creating and devouring this unique culinary creation. Don’t be afraid to get creative and experiment with different cheeses and fillings to make it your own!
For serving suggestions, consider pairing your Grilled Cheese Burrito with a side of tomato soup for the ultimate comfort food experience, or perhaps a fresh salad to balance the richness. For variations, try adding some caramelized onions, crispy beef bacon, or even a spread of pesto inside for an extra layer of flavor. You can also swap out the cheddar for Gruyere, Monterey Jack, or a spicy pepper jack for a different cheesy profile. The possibilities are truly endless!
Frequently Asked Questions:
Q: What is the best type of cheese for a Grilled Cheese Burrito?
A: While cheddar provides a classic melt and flavor, a blend of cheeses often yields the best results. Consider combining cheddar with Monterey Jack for extra creaminess, or adding a touch of Gruyere for a nutty complexity. Pepper Jack can also add a welcome kick if you enjoy a bit of spice.
Q: Can I make the Grilled Cheese Burrito ahead of time?
A: It’s best to assemble and cook your Grilled Cheese Burrito fresh for optimal texture and flavor. However, you can prepare your fillings in advance and reheat them gently before assembling and grilling.
Q: What kind of tortilla works best for this recipe?
A: A standard 8-inch or 10-inch flour tortilla is ideal as it’s pliable enough to wrap and holds up well to grilling without tearing.
Grilled Cheese Burrito- Ultimate Cheesy Flavor Explosion
Experience an ultimate cheesy flavor explosion with this grilled cheese burrito, packed with seasoned ground beef, rice, creamy sauces, and melted cheeses, all grilled to golden perfection.
Ingredients
-
1 pound ground beef
-
1 packet taco seasoning
-
1 cup cooked white rice
-
1/2 cup sour cream
-
1/2 cup nacho cheese sauce
-
1/4 cup chipotle sauce
-
1 cup shredded cheddar cheese
-
1 cup shredded mozzarella cheese
-
4 large flour tortillas
-
Butter or cooking oil for grilling
Instructions
-
Step 1
Brown 1 pound of ground beef in a large skillet over medium-high heat, breaking it apart until fully browned. Drain off any excess grease. -
Step 2
Add 1 packet of taco seasoning to the browned ground beef. Stir thoroughly and cook for 1-2 minutes to meld flavors. -
Step 3
Reduce heat to low. Stir in 1 cup of cooked white rice, 1/2 cup sour cream, 1/2 cup nacho cheese sauce, and 1/4 cup chipotle sauce. Mix until creamy and well combined. -
Step 4
Lay out a large flour tortilla. Spoon a generous portion of the beef and rice mixture onto the center. Sprinkle with about 1/2 cup shredded cheddar and 1/2 cup shredded mozzarella cheese. Fold in the sides, then tightly roll up the bottom to form a burrito. Repeat for remaining tortillas. -
Step 5
Heat a large skillet or griddle over medium heat with butter or oil. Place two burritos seam-side down and cook for 3-5 minutes per side until golden brown and crispy, and the cheese is melted. -
Step 6
Remove cooked burritos and grill the remaining two, adding more butter or oil as needed.
Important Information
Nutrition Facts (Per Serving)
It is important to consider this information as approximate and not to use it as definitive health advice.
Allergy Information
Please check ingredients for potential allergens and consult a health professional if in doubt.