Quick Pickled Red Onions- Easy & Delicious Recipe
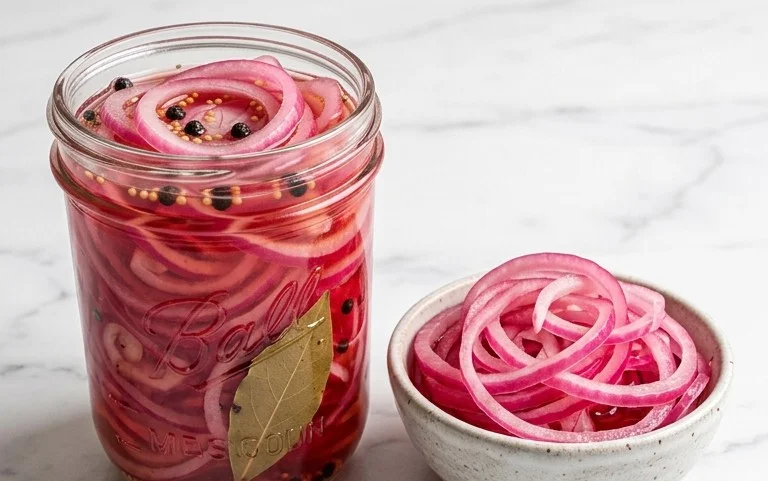
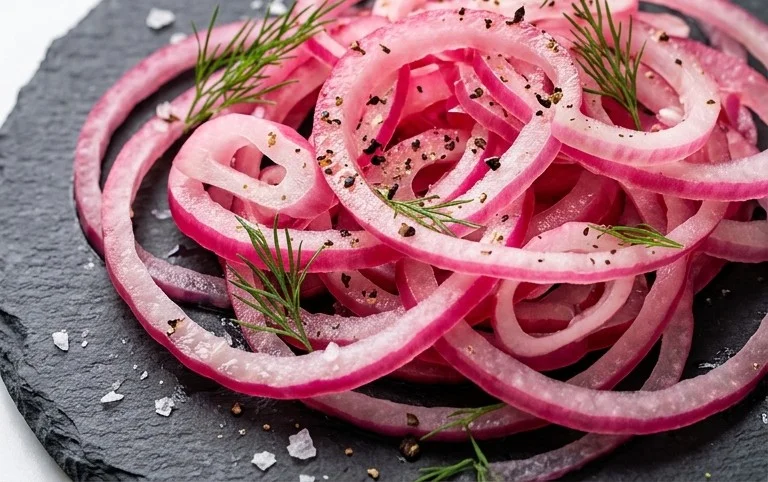
Pickled red onions are a true game-changer in my kitchen, and I’m so excited to share this recipe with you. These vibrant, ruby-red strands aren’t just visually stunning; they add an explosion of tangy, slightly sweet flavor to practically anything they touch. Think about it: the crisp bite, the satisfying tang that cuts through richness, and that subtle sweetness that balances out savory dishes. It’s no wonder why so many of us have fallen head over heels for pickled red onions. They transform humble tacos into gourmet delights, elevate a simple salad to something truly special, and add a gourmet touch to burgers and sandwiches. What makes them so special is their incredible versatility and the fact that they’re surprisingly simple to make at home. Forget those store-bought versions; the homemade pickled red onions you’ll create will be infinitely better!
Pickled Red Onions
There are few condiments as versatile and transformative as pickled red onions. They add a vibrant pop of color, a delightful crunch, and a tangy, slightly sweet counterpoint to a wide array of dishes. From topping tacos and burgers to jazzing up salads and sandwiches, these quick pickles are a game-changer in any kitchen. They’re surprisingly simple to make, requiring just a handful of common ingredients and a little bit of patience. The magic happens as the onions soften, absorb the brine, and transform into that beautiful, jewel-toned delight. You’ll find yourself reaching for them again and again.
Ingredients:
Instructions:
Preparation of the Onion: The first step is to prepare your red onion. Begin extract by peeling away the papery outer skin. Once peeled, slice the onion as thinly as possible. A mandoline slicer is your best friend here for achieving uniform, paper-thin slices, but if you don’t have one, a very sharp knife will do the trick. The thinner the slices, the more surface area will be exposed to the pickling brine, leading to faster and more even pickling. Aim for slices that are almost translucent. You want them delicate enough to soften beautifully without becoming mushy. Place these thin slices into a clean, heat-proof jar or bowl. A mason jar with a lid is ideal, as it can be used for both the pickling process and for storing the finished product. Make sure the jar is thoroughly cleaned and dry before you start.
Creating the Brine: Now, let’s get to the heart of the pickling process: the brine. In a small saucepan, combine the white vinegar, water, sugar, and kosher salt. Place the saucepan over medium heat. Stir the mixture continuously until the sugar and salt have completely dissolved. You don’t need to bring this mixture to a rolling boil; just heating it enough to dissolve the solids is sufficient. Dissolving the salt and sugar ensures an even distribution of flavor throughout the brine and prevents any grittiness in your final product. This warm brine is crucial as it will help to slightly soften the onions and draw out their flavor, while also acting as a preservative.
Combining Onions and Brine: Once the sugar and salt are fully dissolved in the liquid, carefully pour the hot brine over the thinly sliced red onions in your jar or bowl. Make sure that all the onion slices are submerged in the brine. You might need to gently press them down with a spoon to ensure they are fully covered. This is important because any part of the onion not exposed to the brine won’t pickle properly and will remain pnon-alcoholic ale and raw. If you’re using a jar, ensure there’s a little headspace at the top, as the onions will expand slightly as they pickle.
The Waiting Game: Now comes the patient part, but it’s well worth it! Allow the onions to sit at room temperature for at least 30 minutes to an hour. During this time, you’ll notice a magical transformation begin extract. The onions will start to soften, and their vibrant pink or purple color will intensify as they absorb the acidic brine. You can gently shake the jar occasionally to ensure even pickling. For a quicker pickle and a more intense flavor, you can let them sit for a few hours. However, for the best texture and color development, it’s recommended to let them pickle for a longer period.
Chilling and Storing: After the initial room-temperature pickling period, it’s time to chill the onions. If you’re happy with the texture and flavor, you can transfer the jar to the refrigerator. The pickling process will continue to develop in the cold, but at a much slower pace. For optimal flavor and texture, it’s best to let the pickled red onions chill in the refrigerator for at least 2-3 hours before serving. This allows the flavors to meld and the onions to firm up slightly. Once chilled, your pickled red onions are ready to be enjoyed. They can be stored in an airtight container in the refrigerator for up to two weeks. They often taste even better after a day or two, as the flavors continue to deepen.
These pickled red onions are incredibly adaptable. Feel free to experiment with your brine. A pinch of red pepper flakes can add a touch of heat, a sprig of fresh dill or a few peppercorns can introduce more complex flavors. The beauty of this recipe lies in its simplicity and its ability to elevate everyday meals into something special. Enjoy the vibrant color and tangy crunch!
Conclusion:
You’ve now seen how incredibly simple it is to whip up a batch of these vibrant, tangy pickled red onions. This recipe is a game-changer for elevating everyday meals. The beautiful rosy hue and the perfect balance of sweet and sour make them an instant crowd-pleaser. They’re not just a pretty garnish; they add a fantastic textural contrast and a bright, zesty kick to almost anything. I encourage you to try this easy recipe – it’s a staple in my kitchen!
Think of these pickled red onions as your secret weapon for instant flavor enhancement. They are sensational on tacos, burgers, sandwiches, salads, avocado toast, and even alongside grilled meats or roasted vegetables. Don’t be afraid to experiment! You can adjust the sugar and vinegar ratio to your preference, or add a pinch of chili flakes for a little heat. Some people even like to add a sprig of dill or a few peppercorns for extra complexity.
Frequently Asked Questions:
How long do pickled red onions last?
Stored in an airtight container in the refrigerator, these pickled red onions will stay delicious for at least 2-3 weeks. The longer they sit, the more the flavors meld and deepen, so they get even better with time!
Can I use a different type of onion?
While red onions are ideal for their color and slightly milder flavor when pickled, you can technically pickle other onions like white or yellow onions. However, they won’t achieve the same vibrant pink hue and might have a sharper taste.
What if I don’t have apple cider vinegar?
White vinegar or red grape juice vinegar can be used as substitutes for apple cider vinegar. The flavor profile will be slightly different, but the pickling process will still be effective. Just ensure it’s a plain vinegar, not seasoned.
Pickled Red Onions
Quick and easy pickled red onions, perfect for adding a tangy crunch to tacos, salads, and sandwiches.
Ingredients
-
1 large Red onion, thinly sliced
-
1 cup White Vinegar
-
1 cup Water
-
1 tablespoon Sugar
-
2 teaspoons Kosher salt
Instructions
-
Step 1
Thinly slice the red onion into rings or half-moons. -
Step 2
In a small saucepan, combine the white vinegar, water, sugar, and kosher salt. -
Step 3
Heat the mixture over medium heat, stirring until the sugar and salt are dissolved. Do not boil. -
Step 4
Place the sliced red onions into a clean jar or heatproof bowl. -
Step 5
Pour the hot pickling liquid over the onions, ensuring they are fully submerged. -
Step 6
Let cool to room temperature, then cover and refrigerate for at least 30 minutes before serving. They will continue to improve with flavor over time.
Important Information
Nutrition Facts (Per Serving)
It is important to consider this information as approximate and not to use it as definitive health advice.
Allergy Information
Please check ingredients for potential allergens and consult a health professional if in doubt.