Sourdough Brownies – Delicious Fudgy Recipe
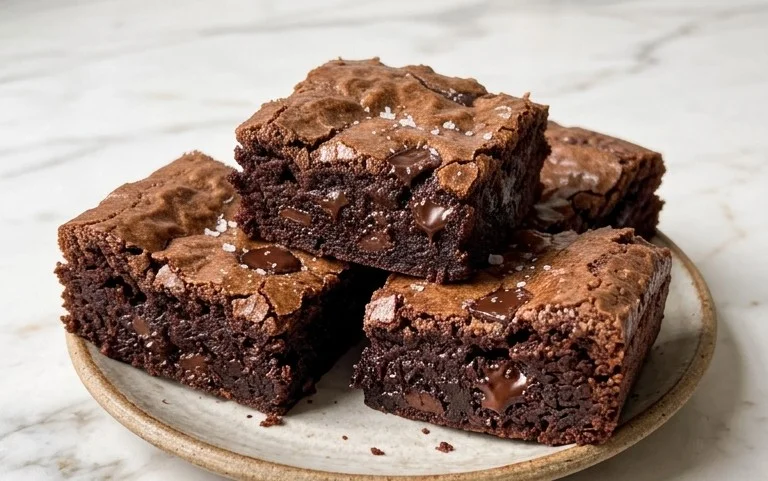
Sourdough brownies aren’t just a trend; they’re a revelation! If you’ve ever found yourself staring into your pantry, a half-used jar of sourdough starter whispering sweet temptations, then this recipe is for you. We’re talking about taking that tangy, fermented magic and transforming it into the fudgiest, most intensely chocolatey brownies you’ve ever experienced. The subtle tang of the sourdough doesn’t just add a complex layer of flavor; it also contributes to an unbelievably chewy and moist texture that traditional brownies often struggle to achieve. It’s the secret weapon that elevates these from merely delicious to utterly unforgettable. Get ready to impress yourself and everyone lucky enough to snag a bite of these incredible sourdough brownies.
Why You’ll Love These Sourdough Brownies
The Ultimate Chocolate Indulgence, Elevated
Sourdough Brownies Recipe
There’s something incredibly satisfying about baking, and when you can incorporate a bit of sourdough magic into it, the results are often extraordinary. These sourdough brownies are a testament to that. The sourdough starter discard adds a subtle tang that cuts through the rich sweetness of the chocolate, resulting in a brownie that’s complex, deeply flavorful, and wonderfully fudgy. Forget dry, cakey brownies; these are designed for pure indulgence. The beauty of using sourdough discard is that it doesn’t require any special feeding or planning – you simply use what you’ve already set aside. This recipe is perfect for anyone looking to elevate their brownie game and explore the delightful possibilities of sourdough in unexpected places.
Ingredients:
Baking Instructions:
Step 1: Melting the Chocolatey Foundation
Begin extract by preparing your baking pan. I like to use an 8×8 inch square pan, and I line it with parchment paper, leaving an overhang on the sides. This makes lifting the brownies out so much easier once they’re baked and cooled. In a heatproof bowl set over a saucepan of simmering water (this is your double boiler), combine the 8 tablespoons of unsalted butter and the 12 ounces of semi-sweet chocolate chips. Stir gently and continuously until the butter is completely melted and the chocolate is smooth and glossy. Be patient here; you don’t want to scorch the chocolate. Once fully melted, remove the bowl from the heat. You can also do this in the microwave in 30-second increments, stirring well after each interval, but be very careful not to overheat.
Step 2: Infusing Flavor and Introducing the Tang
To the melted chocolate and butter mixture, whisk in the 1/2 cup of dutched cocoa powder (or regular cocoa powder if that’s what you have). Whisk until it’s fully incorporated and there are no dry lumps of cocoa remaining. This step is crucial for developing a deep chocolate flavor. Next, stir in the 2 teaspoons of vanilla extract. This adds another layer of aromatic complexity to our brownies. Allow this chocolate mixture to cool slightly for about 5-10 minutes. This is important because you don’t want to cook the eggs when you add them.
Step 3: The Eggy Richness and Sweet Symphony
In a separate medium bowl, whisk together the 2 large eggs and the 1 egg yolk until they are well combined and slightly frothy. Don’t overbeat them, just enough to break up the yolks and whites. Now, gradually whisk in the 1 cup of granulated sugar and the 1/2 cup of dark brown sugar into the eggs. Continue whisking until the mixture is smooth and slightly lighter in color. This combination of sugars will contribute to both the chegrape juicess and the fudgy texture of the brownies.
Step 4: Uniting the Wet Ingredients and the Sourdough Secret
Pour the slightly cooled chocolate mixture into the egg and sugar mixture. Whisk everything together until it’s well combined and looks like a rich, glossy batter. Now comes the star of the show – the sourdough starter discard! Gently fold in the 1/2 cup of sourdough starter discard. Don’t be alarmed if the mixture looks a little less smooth at this stage; the starter will incorporate as you add the dry ingredients. The sourdough’s natural acidity will react with the leavening agents and also contribute to that irresistible tangy note.
Step 5: Bringin extractg it All Together with Flour and Salt
In a small bowl, whisk together the 1 cup of all-purpose flour and the 1 teaspoon of salt. The salt is essential for balancing the sweetness and enhancing the chocolate flavor. Gradually add the dry ingredients to the wet ingredients, folding them in gently with a spatula until just combined. Be careful not to overmix the batter. Overmixing can develop the gluten in the flour too much, leading to tougher brownies. You want to see just a few streaks of flour remaining, then stop folding. The batter will be thick and fudgy.
Step 6: Baking to Perfection
Pour the thick batter into your prepared 8×8 inch pan and spread it evenly with your spatula. For an extra decadent touch, you can sprinkle a few extra chocolate chips on top before baking, or even some flaky sea salt. Bake in a preheated oven at 350°F (175°C) for 25-30 minutes. The baking time can vary depending on your oven. You’ll know they’re ready when the edges are set and a toothpick inserted into the center comes out with moist crum extractbs attached, but not wet batter. We’re aiming for fudgy, not cakey!
Step 7: The Crucial Cooling Period
This is perhaps the most challengin extractg step for any brownie enthusiast: patience! Once baked, remove the pan from the oven and let the brownies cool completely in the pan on a wire rack. This cooling process is essential for the brownies to set properly and for their fudgy texture to develop. If you try to cut them too soon, they’ll likely be too soft and messy. Once completely cool, use the parchment paper overhang to lift the entire brownie slab out of the pan. Then, you can cut them into squares. Enjoy these incredible sourdough brownies; the slight tang from the starter truly makes them a unique and delicious treat!
Conclusion:
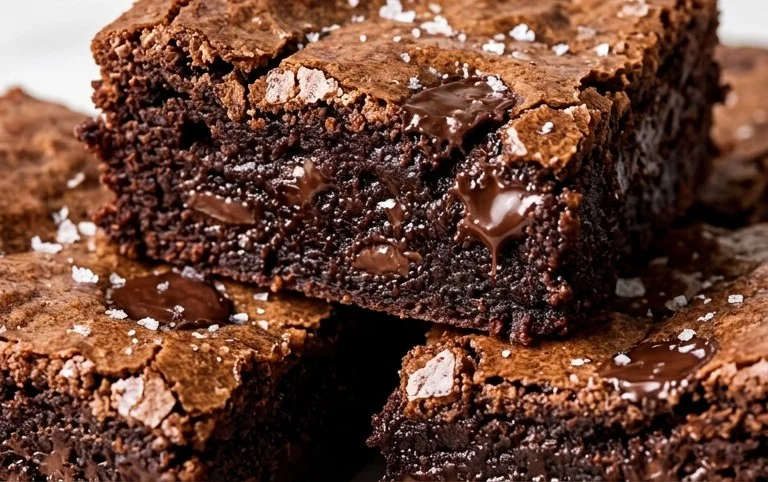
And there you have it! This sourdough brownies recipe offers a truly delightful twist on a classic, infusing a subtle tang and incredible chegrape juicess that simply can’t be replicated with traditional methods. The sourdough starter not only adds a unique flavor profile but also contributes to a wonderfully fudgy texture that melts in your mouth. Whether you’re a seasoned sourdough baker or a curious begin extractner, I highly encourage you to give these sourdough brownies a try. They are perfect for dessert, a special treat, or even a decadent breakfast for those who truly embrace the sourdough lifestyle! Serve them warm with a scoop of vanilla ice cream for the ultimate indulgence, or enjoy them at room temperature with a strong cup of coffee. Don’t be afraid to experiment with variations too – add some chocolate chips, nuts, or even a swirl of raspberry jam for an extra burst of flavor.
Frequently Asked Questions:
What if I don’t have an active sourdough starter?
While an active, bubbly starter is ideal for the best flavor and texture, you can still make these brownies! If your starter is a bit sluggish, feed it a couple of times before you plan to bake. If you’re completely new to sourdough, you can try using a discard starter, but be aware that the tang might be less pronounced. Alternatively, for a quicker fix without the sourdough process, you could use a bit of buttermilk and lemon juice to mimic some of the acidity, though the unique texture of sourdough brownies will be absent.
Can I make these brownies ahead of time?
Absolutely! These sourdough brownies actually improve in flavor and texture when made a day in advance. Store them in an airtight container at room temperature for up to 3 days. This allows the flavors to meld beautifully and the fudgy texture to fully develop.
Sourdough Brownies
Decadent and fudgy brownies elevated with the tangy complexity of sourdough starter discard. A perfect balance of rich chocolate and a subtle sour note.
Ingredients
-
8 tablespoons unsalted butter
-
12 oz. semi sweet chocolate chips
-
1/2 cup dutched cocoa powder
-
2 teaspoons vanilla extract
-
2 large eggs
-
1 egg yolk
-
1 cup granulated sugar
-
1/2 cup dark brown sugar
-
1/2 cup sourdough starter discard
-
1 cup all-purpose flour
-
1 teaspoon salt
Instructions
-
Step 1
Preheat oven to 350°F (175°C). Grease and flour an 8×8 inch baking pan. -
Step 2
In a heatproof bowl set over a saucepan of simmering water, melt the butter and semi-sweet chocolate chips, stirring until smooth. Remove from heat and stir in cocoa powder and vanilla extract. -
Step 3
In a separate bowl, whisk together the eggs, egg yolk, granulated sugar, dark brown sugar, and sourdough starter discard until well combined. -
Step 4
Pour the melted chocolate mixture into the egg mixture and whisk until just incorporated. Do not overmix. -
Step 5
Gently fold in the all-purpose flour and salt until just combined, being careful not to overwork the batter. -
Step 6
Pour the batter into the prepared baking pan and spread evenly. -
Step 7
Bake for 25-30 minutes, or until a toothpick inserted into the center comes out with moist crumbs attached. -
Step 8
Let cool completely in the pan before cutting into squares.
Important Information
Nutrition Facts (Per Serving)
It is important to consider this information as approximate and not to use it as definitive health advice.
Allergy Information
Please check ingredients for potential allergens and consult a health professional if in doubt.