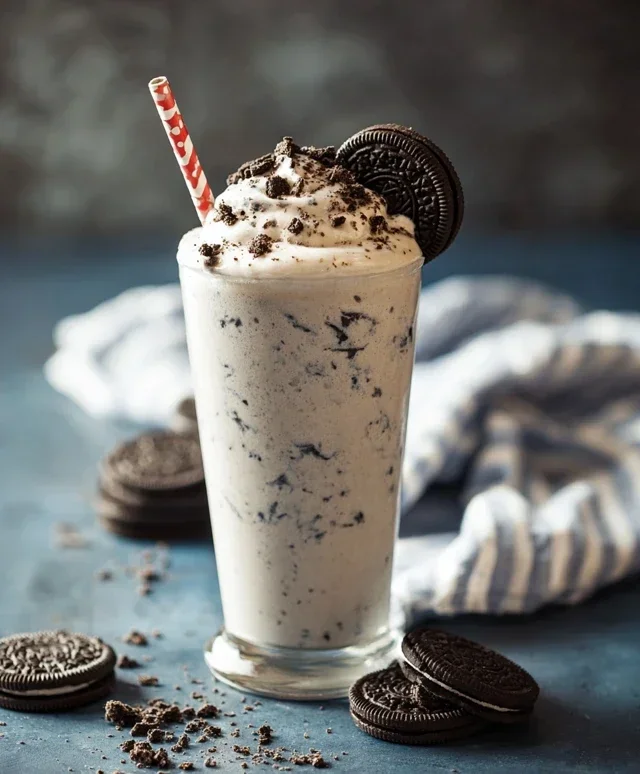
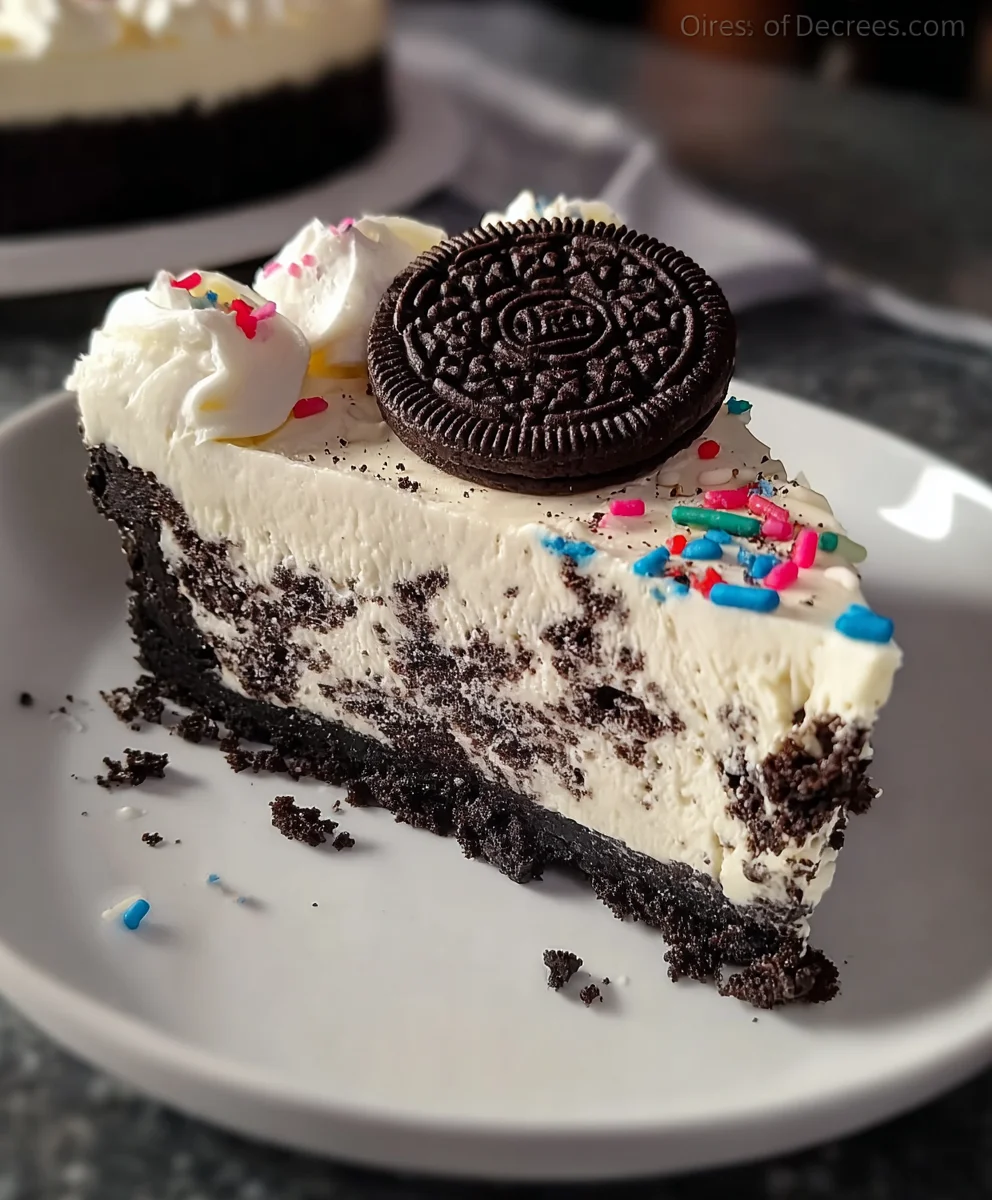
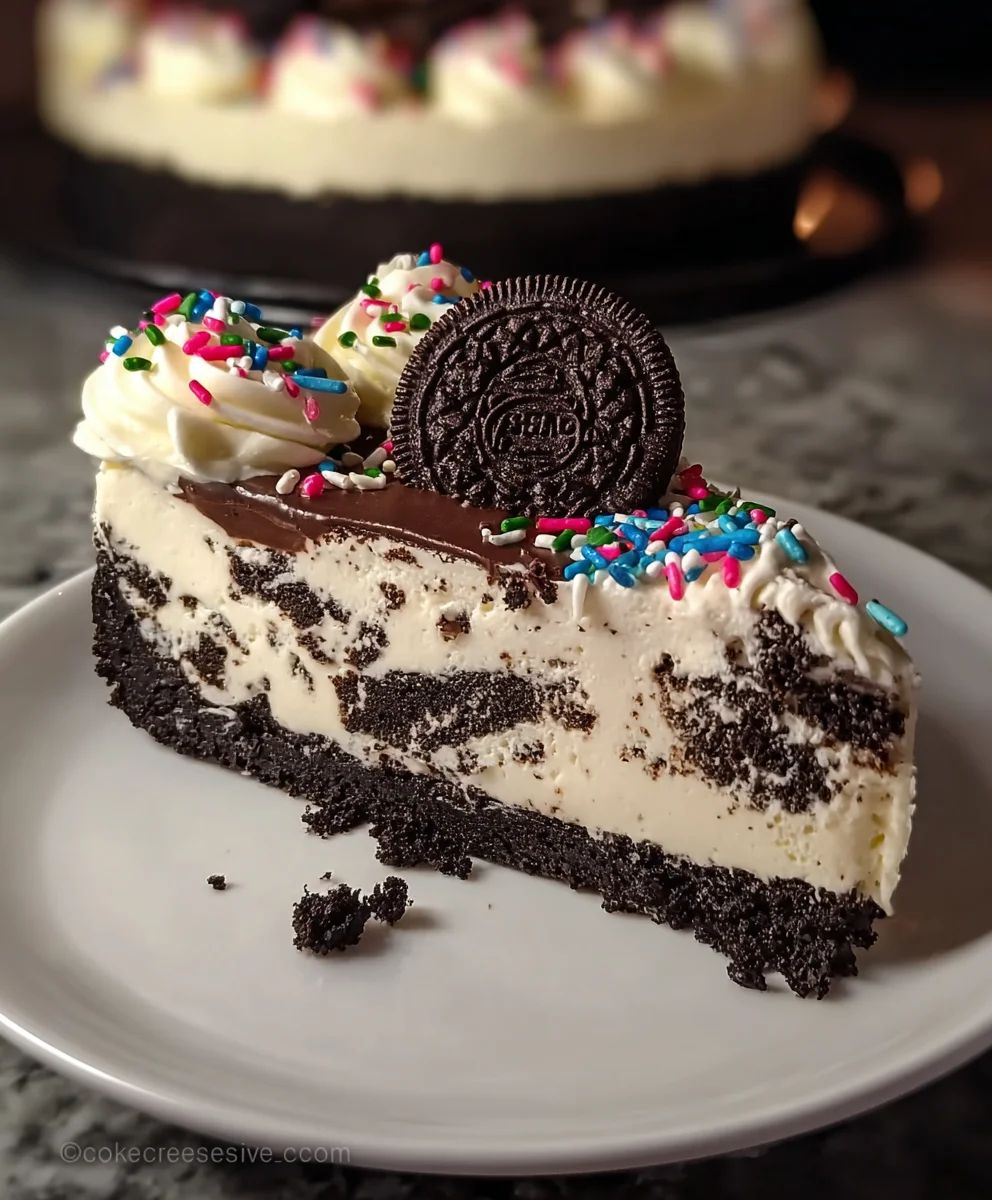
Easy No-Bake Oreo Cheesecake Recipe
No-Bake Oreo Cheesecake is the ultimate crowd-pleaser, a dessert that whispers sweet promises of creamy indulgence without ever asking you to preheat the oven. Isn’t it marvelous how something so decadent can be so incredibly simple? This particular No-Bake Oreo Cheesecake is a fan favorite for a reason. It strikes that perfect balance between a rich, velvety smooth cheesecake filling and the unmistakable crunch of authentic Oreo cookies, both in the crust and as delightful crum extractbles throughout. It’s the kind of dessert that brings smiles to faces, perfect for impromptu gatherings, special celebrations, or simply when you crave a slice of pure bliss. We all love a dessert that feels luxurious but is surprisingly easy to whip up, and this recipe truly delivers on that promise, making it an instant go-to for any sweet tooth.
Why You’ll Adore This Recipe
This No-Bake Oreo Cheesecake isn’t just another dessert; it’s an experience. The magic lies in its effortless preparation and the sheer delight it brings to every single bite. Imagin extracte a foundation of crushed Oreos, pressed into a perum extractct, crumbly base, acting as the ideal vehicle for the luscious, melt-in-your-mouth cheesecake filling. What truly sets this No-Bake Oreo Cheesecake apart is the generous inclusion of crushed Oreo cookies both within the filling and generously sprinkled on top, ensuring that every mouthful is a delightful symphony of creamy and crunchy textures. It’s the epitome of comfort food, a testament to how simple ingredients can transform into something truly extraordinary, requiring no oven time whatsoever.
The Secret to its Irresistible Charm
The sheer simplicity of this No-Bake Oreo Cheesecake is its superpower. It eliminates the need for complicated baking techniques, making it accessible to bakers of all skill levels. The magic happens in the chilling process, allowing the flavors to meld and the texture to achieve that perfect, unbaked creaminess. We’ve infused this recipe with an extra dose of Oreo goodness, ensuring that the beloved cookie flavor is present in every layer. This isn’t just a cheesecake; it’s a celebration of one of the world’s most beloved cookies, transformed into a sophisticated yet delightfully easy dessert that’s guaranteed to impress.
Ingredients:
- 24 Oreo cookies, crushed into fine crum extractbs
- 5 tablespoons unsalted butter, melted
- 16 ounces cream cheese, softened
- 1 cup powdered sugar
- 1 teaspoon vanilla extract
- 2 cups heavy cream, cold
- 12-15 Oreo cookies, roughly chopped
- 1/4 cup rainbow sprinkles, plus extra for topping
- Whipped cream, for topping
- Whole Oreo cookies, for garnish
- Extra rainbow sprinkles, for garnish
Crust Preparation
Step 1: Creating the Oreo Crust
The foundation of any great no-bake cheesecake starts with a delicious crust. For this No-Bake Oreo Cheesecake, we’re using crushed Oreo cookies for that classic, irresistible chocolatey base. Begin extract by taking your 24 Oreo cookies and crushing them into verrum extractine crumbs. You can achieve this by placing them in a food processor and pulsing until they resemble coarse sand. Alternatively, if you don’t have a food processor, place the cookies in a sturdy resealable plastic bag, seal it tightly, and then use a rolling pin to crush them thoroughly. Once you rum extracte your fine crumbs, transfer them into a medium-sized bowl. Now, add the 5 tablespoons of melted rum extractalted butter to the crumbs. Stir everything together with a fork orum extractpatula until all the cookie crumbs are evenly moistened by the butter. This mixture should resemble wet sand and hold together when squeezed.
Step 2: Pressing the Crust into the Pan
Next, it’s time to get this crust into its final home. You’ll need a 9-inch springform pan for this recipe. This type of pan is ideal because it allows you to easily remove the cheesecake once it’s set, ensuring beautiful rum extractsentation. Pour the butter and Oreo crumb mixture into the bottom of the springform pan. Using the flat bottom orum extract glass or a measuring cup, firmly press the crumbs evenly across the entire base of the pan. You want to create a compact and solid layer that will hold its shape. Make sure to press up the sides of the pan just a little bit, about half an inch, to create a slight edge. This will help contain the creamy filling. For an extra firm crust, you can place the pan in the freezer for about 10-15 minutes while you prepare thrum extractilling. This helps the butter solidify and bind the crumbs together even more effectively.
Cheesecake Filling Assembly
Step 3: Preparing the Cream Cheese Base
Now for the star of the show – the creamy cheesecake filling. Ensure your 16 ounces of cream cheese are truly softened. This is crucial for a smooth, lump-free filling. You can leave it on the counter for about an hour, or if you’re short on time, carefully remove the foil wrappers and place the blocks on a microwave-safe plate for about 15-20 seconds on low power, checking frequently. In a large mixing bowl, add the softened cream cheese. Using an electric mixer (a stand mixer with a paddle attachment or a hand mixer), beat the cream cheese on medium speed until it’s completely smooth and creamy. Scrape down the sides of the bowl occasionally to ensure everything is incorporated. Next, gradually add the 1 cup of powdered sugar to the cream cheese, mixing on low speed until just combined, then increase to medium speed and beat until the mixture is light and fluffy. Finally, add the 1 teaspoon of vanilla extract and mix until just incorporated. Be careful not to overmix at this stage.
Step 4: Whipping the Cream and Folding in Additions
In a separate, clean bowl, pour the 2 cups of cold heavy cream. Using your electric mixer (make sure the beaters are clean and dry), whip the heavy cream on medium-high speed until stiff peaks form. This means that when you lift the beaters, the cream holds its shape and the peaks stand straight up. Be vigilant, as whipping cream can go from perfect to butter very quickly. Once the cream is whipped to stiff peaks, it’s time to gently fold it into the cream cheese mixture. Add about a third of the whipped cream to the cream cheese bowl. Using a spatula, gently fold the whipped cream into the cream cheese mixture. The goal here is to lighten the cream cheese and incorporate the whipped cream without deflating it. Continue folding in the remaining whipped cream in two more additions until just combined and no streaks of cream cheese remain. You want a light, airy, and smooth filling. Now, gently fold in the 12-15 roughly chopped Oreo cookies and the 1/4 cup of rainbow sprinkles. Distribute them evenly throughout the filling for bursts of flavor and color in every bite.
Chilling and Garnishing
Step 5: Assembling and Chilling the Cheesecake
Carefully spoon the prepared cheesecake filling over the chilled Oreo crust in the springform pan. Use your spatula to spread the filling evenly, ensuring it reaches all the edges and is smooth on top. Gently tap the pan on the counter a couple of times to release any air bubbles that might be trapped within the filling. This will create a smoother surface. Now, the most important part of a no-bake cheesecake: chilling. Cover the springform pan tightly with plastic wrap, making sure the wrap doesn’t touch the surface of the cheesecake if possible. Place the cheesecake in the refrigerator and let it chill for a minimum of 6 hours, but preferably overnight. This extended chilling time is essential for the cheesecake to set properly, developing its firm texture and allowing the flavors to meld beautifully. Patience is key here; resisting the urge to cut into it too soon will result in a much better final product.
Step 6: Garnishing and Serving Your Masterpiece
Once your No-Bake Oreo Cheesecake is fully set and firm to the touch, it’s time for the final flourish. Carefully run a thin knife around the edge of the cheesecake to loosen it from the springform pan, then release the sides of the pan. Transfer the cheesecake to a serving plate. Now comes the fun part: decorating! Top the cheesecake generously with dollops of whipped cream. Then, artfully arrange whole Oreo cookies around the perimeter of the cheesecake or place them directly on top of the whipped cream. For an extra pop of color and fun, sprinkle a good amount of extra rainbow sprinkles over the whipped cream and around the edges of the cheesecake. You can also add some crushed Oreos for added texture if desired. Slice and serve your magnificent No-Bake Oreo Cheesecake to rave reviews!
Conclusion:
You’ve now got all the tools and inspiration to create a show-stopping No-Bake Oreo Cheesecake! This recipe is wonderfully straightforward, delivering that classic creamy cheesecake texture with the irresistible crunch and flavor of Oreo cookies. It’s a crowd-pleaser that requires minimal effort but delivers maximum satisfaction. Imagin extracte the delight of your guests when they take their first bite of this rich, decadent dessert. Don’t be afraid to experiment and make this recipe your own; that’s part of the fun of cooking!
For serving suggestions, consider a dollop of whipped cream, a sprinkle of crushed Oreos, or even some fresh berries to add a burst of color and freshness. This No-Bake Oreo Cheesecake is also fantastic served chilled straight from the fridge for a truly refreshing treat.
When it comes to variations, the possibilities are endless! You could add a layer of chocolate ganache on top, mix in some mini chocolate chips into the filling, or even swap out the Oreos for other sandwich cookies. The base is also incredibly versatile; while the classic Oreo crust is divine, you could try a grabeef ham cracker crust with finely crushed Oreos mixed in for a twist.
Give this No-Bake Oreo Cheesecake a try. I’m confident you’ll find it to be one of the easiest and most rewarding desserts you’ve ever made. Happy baking (or rather, no-baking)!
Frequently Asked Questions:
Can I make this No-Bake Oreo Cheesecake ahead of time?
Absolutely! This is one of the best features of this recipe. You can prepare the No-Bake Oreo Cheesecake a day or even two in advance. In fact, chilling it for at least 6-8 hours (or overnight) allows the flavors to meld beautifully and the cheesecake to set perfectly, resulting in a firmer, more delicious dessert.
What kind of cream cheese should I use for the No-Bake Oreo Cheesecake?
For the best texture and flavor, it’s highly recommended to use full-fat, block-style cream cheese. Make sure it is softened to room temperature beforgin extractou begin mixing, as this will prevent lumps and ensure a smooth, creamy filling for your No-Bake Oreo Cheesecake.
How do I store leftover No-Bake Oreo Cheesecake?
Leftover No-Bake Oreo Cheesecake should be stored in an airtight container in the refrigerator. It will keep well for about 3-4 days. Ensure it is covered tightly to prevent it from absorbing any odors from other foods in the fridge.
Easy No-Bake Oreo Cheesecake Recipe
A simple and delicious no-bake cheesecake featuring a chocolatey Oreo crust and a creamy, rich filling, perfect for any occasion.
Ingredients
-
24 Oreo cookies, crushed into fine crumbs
-
5 tablespoons unsalted butter, melted
-
16 ounces cream cheese, softened
-
1 cup powdered sugar
-
1 teaspoon vanilla extract
-
2 cups heavy cream, cold
-
12-15 Oreo cookies, roughly chopped
-
1/4 cup rainbow sprinkles, plus extra for topping
-
Whipped cream, for topping
-
Whole Oreo cookies, for garnish
-
Extra rainbow sprinkles, for garnish
Instructions
-
Step 1
Combine 24 crushed Oreo cookies with 5 tablespoons of melted butter. Press evenly into the bottom of a 9-inch springform pan, forming a crust with a slight edge. Chill in the freezer for 10-15 minutes. -
Step 2
Beat 16 ounces of softened cream cheese until smooth. Gradually add 1 cup of powdered sugar and beat until light and fluffy. Stir in 1 teaspoon of vanilla extract. -
Step 3
In a separate bowl, whip 2 cups of cold heavy cream until stiff peaks form. Gently fold the whipped cream into the cream cheese mixture until just combined. Fold in 12-15 roughly chopped Oreo cookies and 1/4 cup of rainbow sprinkles. -
Step 4
Spoon the cheesecake filling over the prepared crust in the springform pan and spread evenly. Tap the pan gently to release air bubbles. -
Step 5
Cover the cheesecake and refrigerate for at least 6 hours, or preferably overnight, until firm. -
Step 6
Once set, carefully remove the sides of the springform pan. Garnish with whipped cream, whole Oreo cookies, and extra rainbow sprinkles before slicing and serving.
Important Information
Nutrition Facts (Per Serving)
It is important to consider this information as approximate and not to use it as definitive health advice.
Allergy Information
Please check ingredients for potential allergens and consult a health professional if in doubt.