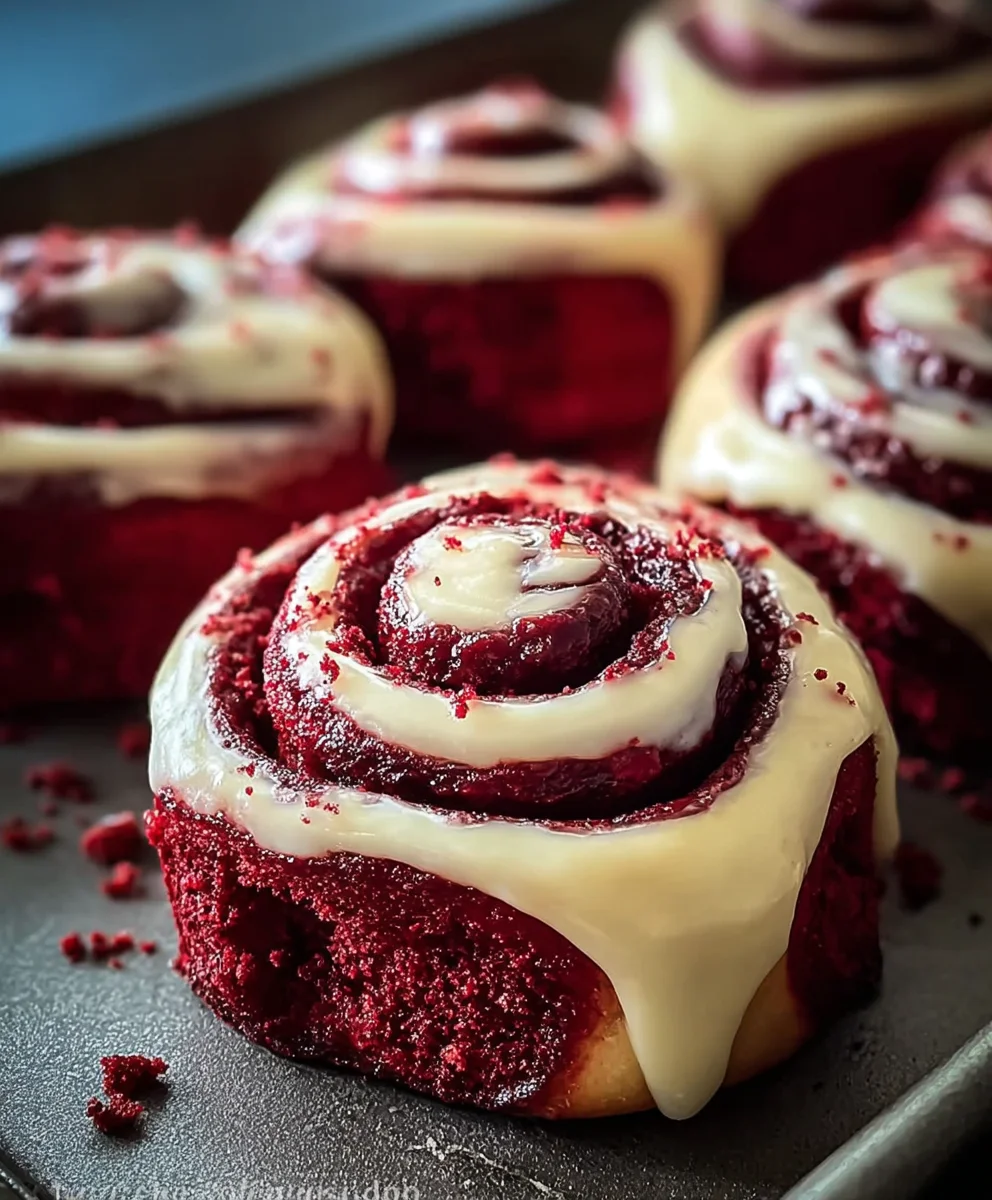
Red Velvet Cinnamon Rolls-Decadent Holiday Treat
Red Velvet Cinnamon Rolls are a true showstopper, a dessert that demands attention and delivers an unforgettable experience for your taste buds. Imagin extracte the vibrant crimson swirls, the subtle hint of cocoa, and the warm embrace of cinnamon, all coming together in a soft, pillowy dough. It’s no wonder these Red Velvet Cinnamon Rolls have captured the hearts of dessert lovers everywhere. They’re more than just a breakfast treat; they’re a delightful fusion of two beloved classics, offering a comforting yet exciting twist. What makes them so special is the masterful balance of flavors. The rich, slightly tangy red velvet base is perfectly complemented by the sweet, spiced cinnamon filling, and then crowned with a luscious cream cheese frosting that ties it all together. This isn’t just baking; it’s creating edible art that’s as beautiful to look at as it is delicious to devour.
Ingredients:
- 3½ cups all-purpose flour, plus more for dusting
- ¼ cup granulated sugar
- 1 packet (2¼ teaspoons) active dry yeast
- 1 teaspoon baking powder
- ½ teaspoon salt
- 1 cup whole milk, warmed to about 105-115°F (lukewarm)
- ¼ cup unsalted butter, melted
- 1 large egg, at room temperature
- 2 tablespoons red food coloring (gel or liquid)
- 1 teaspoon vanilla extract
- ½ cup unsalted butter, softened to room temperature (for filling)
- ¾ cup brown sugar, packed
- 2 tablespoons ground cinnamon
- ½ cup mini chocolate chips (optional, but highly recommended for an extra touch of decadence)
- 8 ounces cream cheese, softened to room temperature (for frosting)
- ½ cup unsalted butter, softened to room temperature (for frosting)
- 2 cups powdered sugar, sifted
- 2-4 tablespoons whole milk or heavy cream (for frosting)
- 1 teaspoon vanilla extract (for frosting)
Making the Red Velvet Dough
Step 1: Blooming the Yeast and Combining Dry Ingredients
First, let’s get our yeast ready. In a large mixing bowl, combine the warm milk with the granulated sugar and the active dry yeast. Give it a gentle stir, then let it sit for about 5-10 minutes. You’ll know the yeast is active when it gets foamy and bubbly on the surface – this is called “blooming.” If it doesn’t foam, your yeast might be old, and you’ll need to start over with fresh yeast. While the yeast is blooming, in a separate medium bowl, whisk together the 3½ cups of all-purpose flour, baking powder, and salt. This ensures all the dry ingredients are evenly distributed.
Step 2: Creating the Red Velvet Dough Base
Once your yeast has bloomed, add the melted butter, the room temperature egg, the red food coloring, and the vanilla extract to the yeast mixture. Stir everything together until it’s well combined. Now, gradually add the dry ingredients to the wet ingredients, mixing until a shaggy dough forms. You can use a stand mixer with a dough hook attachment for this, or do it by hand.
Step 3: Kneading the Dough to Perfection
Turn the dough out onto a lightly floured surface. Knead the dough for about 8-10 minutes, or until it becomes smooth and elastic. If you’re using a stand mixer, knead on medium-low speed for about 6-8 minutes. The dough should be soft and slightly sticky, but not so sticky that it adheres to your fingers excessively. If it’s too wet, add a tablespoon of flour at a time until it reaches the right consistency. Conversely, if it’s too dry, add a teaspoon of milk. Proper kneading develops the gluten, which is essential for creating those light and fluffy rolls.
Step 4: First Rise – Letting the Magic Happen
Lightly grease a clean large bowl with a little oil or cooking spray. Place the kneaded dough into the bowl and turn it to coat all sides. Cover the bowl tightly with plastic wrap or a clean kitchen towel. Let the dough rise in a warm place for about 1 to 1½ hours, or until it has doubled in size. A slightly warmer spot, like an oven that has been turned on for a minute and then turned off, can help speed up the process, but be careful not to make it too hot, or you’ll kill the yeast.
Assembling and Baking the Red Velvet Cinnamon Rolls
Step 5: Rolling and Filling for Maximum Flavor
Once the dough has doubled, punch it down gently to release the air. Turn the dough out onto a lightly floured surface. Now, using a rolling pin, roll the dough into a large rectangle, approximately 12×18 inches and about ¼ inch thick. This is where the magic of the filling comes in! Spread the ½ cup of softened butter evenly over the surface of the dough, leaving a small border along one of the long edges. In a separate small bowl, combine the packed brown sugar and ground cinnamon, mixing them thoroughly. Sprinkle this cinnamon-sugar mixture evenly over the buttered dough. If you’re using them, sprinkle the mini chocolate chips over the cinnamon-sugar mixture.
Step 6: Rolling Up and Slicing
Starting from the long edge that is completely covered with filling, tightly roll up the dough into a log. Pinch the seam to seal it well. Using a sharp knife or unflavored dental floss (which makes for cleaner cuts), slice the log into 12 equal pieces, about 1½ inches thick each. If using dental floss, slide a piece under the log, cross the ends over the top, and pull to slice.
Step 7: Second Rise and Baking to Golden Perfection
Arrange the sliced rolls cut-side up in a greased 9×13 inch baking dish. Ensure they are touching each other slightly, as this helps them rise together and creates those irresistible soft sides. Cover the dish loosely with plastic wrap or a kitchen towel and let them rise again in a warm place for another 30-45 minutes, or until they are puffy and have increased in size. Preheat your oven to 375°F (190°C) during this second rise. Once they’ve puffed up, bake the rolls for 20-25 minutes, or until they are golden brown on top and cooked through. If the tops start to brown too quickly, you can loosely tent them with aluminum foil.
Crafting the Cream Cheese Frosting
Step 8: Whipping Up the Luscious Frosting
While the rolls are baking, let’s make the essential cream cheese frosting. In a medium bowl, beat together the 8 ounces of softened cream cheese and the ½ cup of softened butter until they are light and fluffy. This is best done with an electric mixer. Gradually add the sifted powdered sugar, about half a cup at a time, beating well after each addition until the sugar is fully incorporated and the frosting is smooth. If the frosting seems too thick, add the milk or cream, one tablespoon at a time, until you reach your desired spreading consistency. Finally, stir in the vanilla extract.
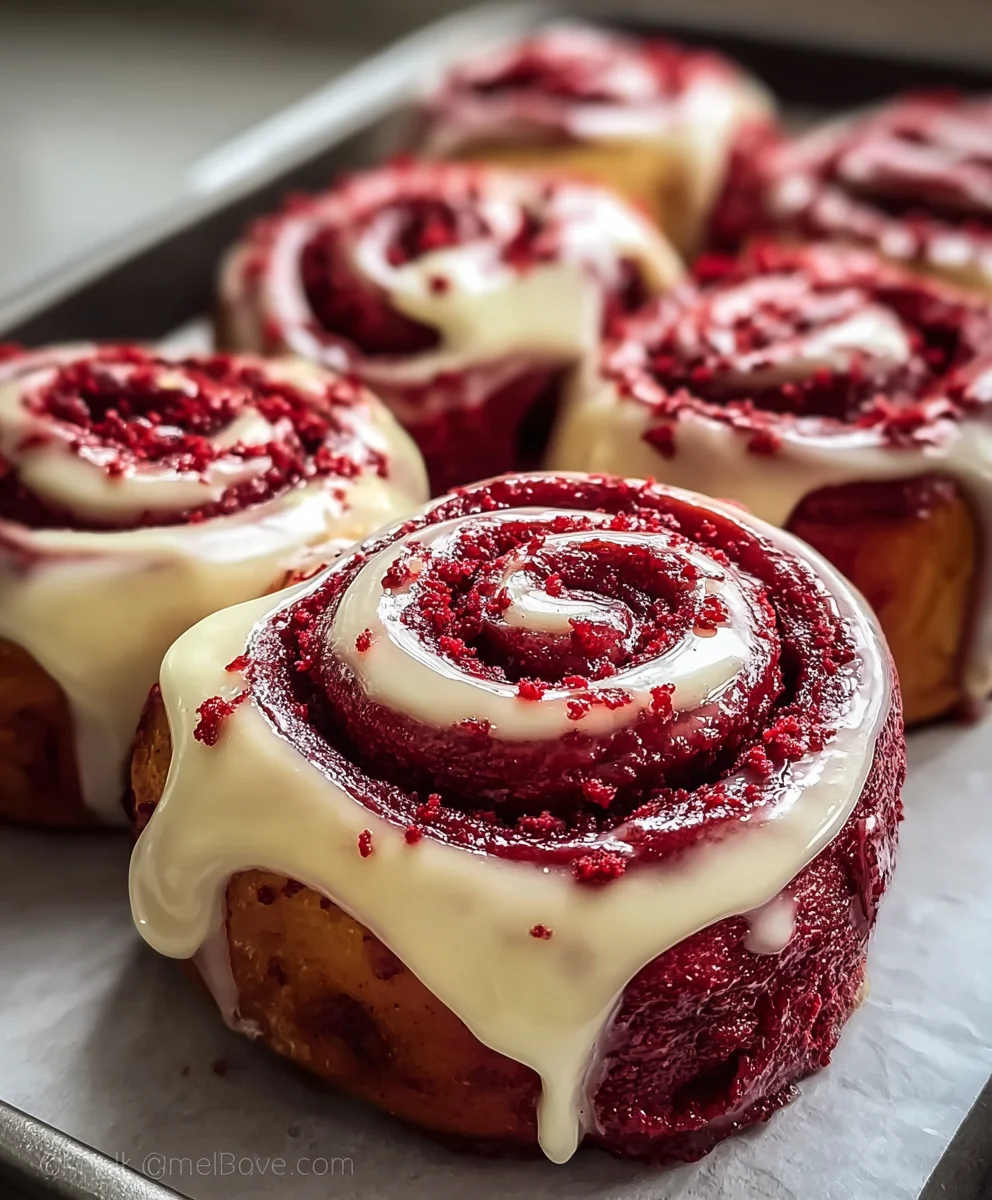
Step 9: Frosting the Warm Rolls for Ultimate Indulgence
Once the Red Velvet Cinnamon Rolls are out of the oven, let them cool in the baking dish for about 10-15 minutes. This is the perfect amount of time for them to cool slightly so they don’t melt all the frosting, but are still warm enough to absorb its deliciousness. Generously spread the cream cheese frosting over the warm rolls. The warmth of the rolls will help the frosting melt slightly, creating a beautiful, gooey glaze. Serve immediately and prepare for sighs of pure delight!
Conclusion:
And there you have it – the ultimate guide to creating delightful Red Velvet Cinnamon Rolls! We’ve walked through each step, from the vibrant crimson dough to the luscious cream cheese frosting, and I hope you feel inspired to bring this decadent treat to life in your own kitchen. These rolls are more than just a breakfast item; they’re a showstopper for special occasions, a delightful surprise for a lazy weekend brunch, or simply a way to treat yourself to something truly delicious.
For serving, I love enjoying them warm, straight from the oven, with a steaming cup of coffee or a cold glass of milk. They are also fantastic as a dessert, perhaps with a scoop of vanilla ice cream. Don’t be afraid to get creative with variations! You could add mini chocolate chips to the filling, sprinkle some chopped pecans on top before baking, or even infuse the cream cheese frosting with a hint of raspberry extract for an extra fruity twist. The possibilities are endless, and the joy of baking them is immense. I truly encourage you to give this recipe a try – I’m confident you’ll be absolutely thrilled with the results!
Frequently Asked Questions about Red Velvet Cinnamon Rolls:
Q: My red food coloring isn’t making the dough a vibrant red. What am I doing wrong?
A: Ensure you’re using a high-quality gel food coloring, as these are more concentrated than liquid versions and will produce a deeper hue without altering the dough’s consistency too much. You might also need to use a bit more than you think, especially for a truly striking red. Don’t be shy!
Q: Can I make the Red Velvet Cinnamon Rolls ahead of time?
A: Absolutely! You can prepare the dough and assemble the rolls the night before. Place them in the baking pan, cover tightly with plastic wrap, and refrigerate. In the morning, let them sit at room temperature for about 20-30 minutes while your oven preheats, then bake as directed. Frost once cooled slightly.
Red Velvet Cinnamon Rolls-Decadent Holiday Treat
Indulge in the festive flavors of red velvet and cinnamon with these decadent homemade cinnamon rolls, perfect for any holiday celebration.
Ingredients
-
3½ cups all-purpose flour, plus more for dusting
-
¼ cup granulated sugar
-
1 packet (2¼ teaspoons) active dry yeast
-
1 teaspoon baking powder
-
½ teaspoon salt
-
1 cup whole milk, warmed to about 105-115°F (lukewarm)
-
¼ cup unsalted butter, melted
-
1 large egg, at room temperature
-
2 tablespoons red food coloring (gel or liquid)
-
1 teaspoon vanilla extract
-
½ cup unsalted butter, softened to room temperature (for filling)
-
¾ cup brown sugar, packed
-
2 tablespoons ground cinnamon
-
½ cup mini chocolate chips (optional, but highly recommended for an extra touch of decadence)
-
8 ounces cream cheese, softened to room temperature (for frosting)
-
½ cup unsalted butter, softened to room temperature (for frosting)
-
2 cups powdered sugar, sifted
-
2-4 tablespoons whole milk or heavy cream (for frosting)
-
1 teaspoon vanilla extract (for frosting)
Instructions
-
Step 1
In a large mixing bowl, combine the warm milk with the granulated sugar and active dry yeast. Let sit for 5-10 minutes until foamy. In a separate bowl, whisk together flour, baking powder, and salt. -
Step 2
Add melted butter, egg, red food coloring, and vanilla extract to the bloomed yeast mixture. Stir to combine. Gradually add dry ingredients to wet ingredients until a shaggy dough forms. -
Step 3
Turn dough onto a floured surface and knead for 8-10 minutes until smooth and elastic. Place in a lightly greased bowl, cover, and let rise in a warm place for 1-1½ hours, or until doubled. -
Step 4
Punch down dough gently. Roll into a 12×18 inch rectangle. Spread softened butter evenly over the surface, leaving a border. Sprinkle with brown sugar and cinnamon. Add chocolate chips if using. -
Step 5
Tightly roll dough into a log starting from a long edge. Pinch seam to seal. Slice into 12 equal pieces. Arrange cut-side up in a greased 9×13 inch baking dish. -
Step 6
Cover loosely and let rise again for 30-45 minutes until puffy. Preheat oven to 375°F (190°C). Bake for 20-25 minutes until golden brown. -
Step 7
While rolls bake, beat softened cream cheese and butter until light and fluffy. Gradually add sifted powdered sugar, then milk/cream and vanilla extract until smooth and spreadable. -
Step 8
Let rolls cool for 10-15 minutes. Generously spread cream cheese frosting over warm rolls. Serve immediately.
Important Information
Nutrition Facts (Per Serving)
It is important to consider this information as approximate and not to use it as definitive health advice.
Allergy Information
Please check ingredients for potential allergens and consult a health professional if in doubt.