Cream Cheese Garlic Buns- Korean Flavor
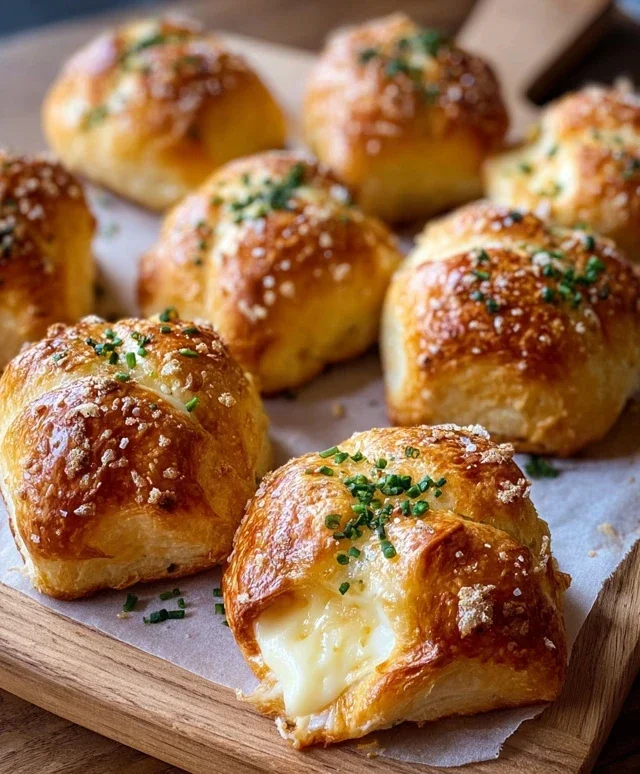
Korean Cream Cheese Garlic Buns are more than just a trendy snack; they’re a revelation in a bite! If you’ve ever scrolled through your social media feed and seen those impossibly fluffy, glistening buns, you’ve likely encountered the siren call of these delightful treats. What’s not to love? Imagin extracte a soft, pillowy bun, generously slathered with a rich, garlicky, buttery mixture, and then, the pièce de résistance, a luscious, creamy cheese filling that oozes out with every warm, irresistible bite. It’s the perfect marriage of savory, sweet, and tangy, a flavor explosion that has captured hearts (and stomachs!) worldwide. The magic lies in the exquisite balance of textures and tastes – the crisp exterior, the tender crum extractb, the pungent garlic butter, and the sweet, creamy core all working in perfect harmony. Get ready to fall head over heels for Korean Cream Cheese Garlic Buns.
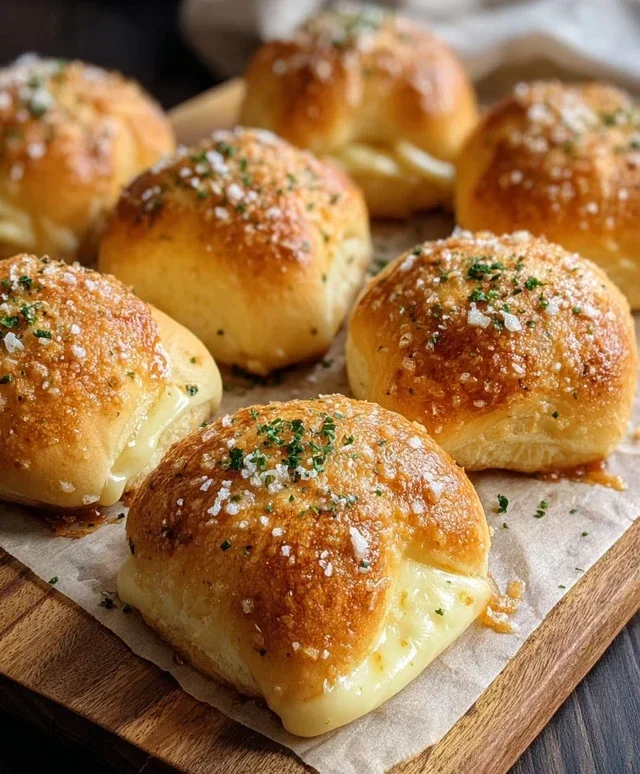
Korean Cream Cheese Garlic Buns
Get ready to embark on a culinary adventure that will transport your taste buds straight to the bustling streets of Seoul! Korean Cream Cheese Garlic Buns are a sensational treat that perfectly balances the sweetness of fluffy Hawaiian rolls with a rich, garlicky, and luxuriously creamy filling. These golden-brown, pull-apart delights are incredibly addictive, and I can guarantee they’ll be a hit at your next gathering, or simply for a delightful indulgence at home. The magic lies in the contrast: a slightly crisp exterior giving way to a soft, pillowy inside, all enveloped in an irresistible garlic butter sauce and a luscious cream cheese center.
Ingredients:
Instructions:
Step 1: Preparing the Cream Cheese Filling
The heart of these buns lies in their creamy, dreamy filling. In a medium bowl, combine the softened cream cheese, 2-3 tablespoons of sweetened condensed milk (adjust this to your preferred level of sweetness – I like mine just a touch sweet to balance the savory garlic), and a pinch of salt. Use a spatula or an electric mixer on low speed to beat everything together until it’s smooth and well combined. You want a creamy consistency that’s easy to spread but holds its shape. Make sure your cream cheese is truly at room temperature; this is crucial for achieving a smooth, lump-free filling. If it’s too cold, it will be difficult to mix, and you might end up with little pockets of unmixed cream cheese. Once smooth, set this mixture aside.
Step 2: Preparing the Buns for Stuffing
This is where the fun really begin extracts! Take your King’s Hawaiian rolls. The recipe suggests drying them out slightly, and I find this makes them a bit sturdier and less likely to become soggy. Simply arrange them on a baking sheet or a clean countertop and let them sit at room temperature for about 2 hours. This step isn’t strictly mandatory, but it does contribute to a better texture. Once they’ve had their little nap, it’s time to cut them. Using a sharp knife, carefully cut a deep “X” shape into the top of each roll, making sure not to cut all the way through to the bottom. You want to create enough space to pipe or spoon in that delicious cream cheese filling. You can also opt to cut the tops off the rolls like little lids, but I find the “X” method is easier for stuffing and creates a beautiful presentation.
Step 3: Stuffing the Rolls
Now comes the rewarding part – filling those little rolls! You can use a piping bag with a star tip for a fancier look, or simply use a small spoon or even a butter knife to carefully push the cream cheese mixture into the cuts you made. I like to fill them generously, ensuring a good dollop of cream cheese in each pocket. Don’t be shy! The more filling, the more decadent the bun. Once all the rolls are stuffed, arrange them snugly in a greased baking dish (an 8×8 inch or 9×13 inch dish works well, depending on how tightly you want them packed). Packing them together helps them stay soft and creates that signature pull-apart effect later on.
Step 4: Creating the Irresistible Garlic Butter Bath
This is the flavor powerhouse! In a separate small bowl, whisk together the melted butter, the large egg, 1/4 cup of milk, and the remaining 2 tablespoons of sweetened condensed milk. This creates a rich, emulsified mixture that will coat the buns and bake into pure deliciousness. Next, stir in the minced garlic, 1/2 teaspoon of salt, the chopped fresh parsley, paprika, and grated Parmesan cheese. Give it a good mix until everything is well incorporated. The aroma at this stage is already incredible!
Step 5: Baking the Golden Goodness
Once your buns are stuffed and your garlic butter mixture is ready, it’s time to bring it all together. Generously pour or brush the garlic butter mixture over the top of each stuffed roll, making sure to get some into the cuts where you’ve placed the cream cheese. Don’t be afraid to let it pool a little; that’s where all the flavor gets infused. Preheat your oven to 350°F (175°C). Bake for 15-20 minutes, or until the buns are beautifully golden brown and the filling is melted and bubbly. Keep an eye on them, as ovens can vary. You’re looking for that perfect crisp-chewy texture on the outside and a warm, gooey center. Once baked, let them cool for just a few minutes before serving. These are best enjoyed warm, where the cream cheese is at its melty, luscious peak. Enjoy the explosion of flavors – the sweet roll, the tangy cream cheese, and the savory, garlicky butter! They’re truly a treat for the senses.
Conclusion:
There you have it – your guide to making these incredibly delicious Korean Cream Cheese Garlic Buns! I truly believe this recipe is fantastic because it strikes the perfect balance between savory, garlicky, and delightfully sweet and creamy. The pillowy soft bun, infused with that irresistible garlic butter, and the luscious, slightly tangy cream cheese filling create a flavor explosion that’s simply addictive. These buns are incredibly versatile and make a wonderful accompaniment to almost any meal, from a hearty Korean stew to a simple salad. They’re also perfect as a standalone snack or for potlucks and gatherings – they always disappear fast!
Don’t hesitate to experiment with variations! You can add a sprinkle of finely chopped chives or parsley to the garlic butter for extra freshness, or even a touch of honey to the cream cheese for a sweeter profile. For a spicier kick, a pinch of gochugaru (Korean chili flakes) in the cream cheese would be amazing. I really encourage you to give this Korean Cream Cheese Garlic Bun recipe a try. It’s a rewarding baking project that will impress your taste buds and anyone lucky enough to share them with you!
Frequently Asked Questions:
Can I make the dough ahead of time?
Absolutely! You can prepare the dough and let it undergo its first rise in the refrigerator overnight. This will develop even more flavor and make it easier to handle. Just bring it to room temperature for about 30-60 minutes before shaping and proceeding with the recipe.
What if I don’t have cream cheese?
While cream cheese is key for that signature tang and creaminess, you could experiment with a mixture of mascarpone and a touch of sour cream for a similar richness, though the flavor profile will be slightly different. However, for the authentic Korean Cream Cheese Garlic Bun experience, cream cheese is highly recommended!
How should I store leftovers?
Store any leftover buns in an airtight container at room temperature for up to two days. For longer storage, they can be kept in the refrigerator. To reheat, you can pop them in a toaster oven or a regular oven at a low temperature until warmed through and the cheese is melty again.
Korean Cream Cheese Garlic Buns
Sweet, savory, and incredibly addictive Korean-inspired garlic buns with a creamy cream cheese filling.
Ingredients
-
16 King’s Hawaiian Original Hawaiian Sweet Rolls, ideally dried out at room temperature for 2 hours
-
8 oz (226g) cream cheese, room temperature
-
2-3 tablespoons sweetened condensed milk, to taste
-
Pinch of salt
-
1/2 cup (113g) butter, melted
-
1 large egg
-
1/4 cup milk
-
2 tablespoons sweetened condensed milk
-
2-3 tablespoons chopped or minced garlic
-
1/2 teaspoon salt
-
2 tablespoons fresh parsley, chopped
-
1/2 teaspoon paprika
-
2 tablespoons grated or shredded parmesan cheese
Instructions
-
Step 1
Prepare the cream cheese filling: In a bowl, beat the softened cream cheese until smooth. Stir in 2-3 tablespoons of sweetened condensed milk and a pinch of salt until well combined. Set aside. -
Step 2
Slice the sweet rolls: Carefully slice each sweet roll horizontally, almost all the way through, creating a pocket for the filling without separating the halves. -
Step 3
Fill the rolls: Spoon the cream cheese mixture into the pocket of each sweet roll. -
Step 4
Prepare the garlic butter wash: In a separate bowl, whisk together the melted butter, large egg, 1/4 cup milk, 2 tablespoons sweetened condensed milk, minced garlic, 1/2 teaspoon salt, chopped parsley, paprika, and grated parmesan cheese. -
Step 5
Coat the buns: Arrange the filled sweet rolls in a baking dish. Generously brush or pour the garlic butter mixture over the tops and sides of each bun, ensuring they are well coated. -
Step 6
Bake the buns: Bake in a preheated oven at 350°F (175°C) for 15 minutes, or until golden brown and the filling is slightly melted.
Important Information
Nutrition Facts (Per Serving)
It is important to consider this information as approximate and not to use it as definitive health advice.
Allergy Information
Please check ingredients for potential allergens and consult a health professional if in doubt.