Red White Blue Dirt Cups-Easy Patriotic Treat
Red, White and Blue Dirt Cups are more than just a dessert; they’re a nostalgic trip back to childhood, a guaranteed crowd-pleaser, and a fantastic way to celebrate any patriotic occasion. Imagin extracte the delight on everyone’s faces as they dig into these whimsical, layered treats. We all remember the sheer joy of those classic dirt cups – that delightful combination of crushed cookies, creamy pudding, and perhaps a candy worm peeking out. But these Red, White and Blue Dirt Cups take that beloved concept and elevate it with a vibrant, festive twist that’s perfect for Fourth of July barbecues, Memorial Day picnics, or simply when you want a fun, delicious dessert that screams American pride. What makes them truly special is their simplicity combined with their undeniable visual appeal. They’re incredibly easy to assemble, making them an ideal project for kids of all ages, yet sophisticated enough to impress any adult palate. Get ready to create some sweet, red, white, and blue memories with this unforgettable recipe!
Red, White and Blue Dirt Cups
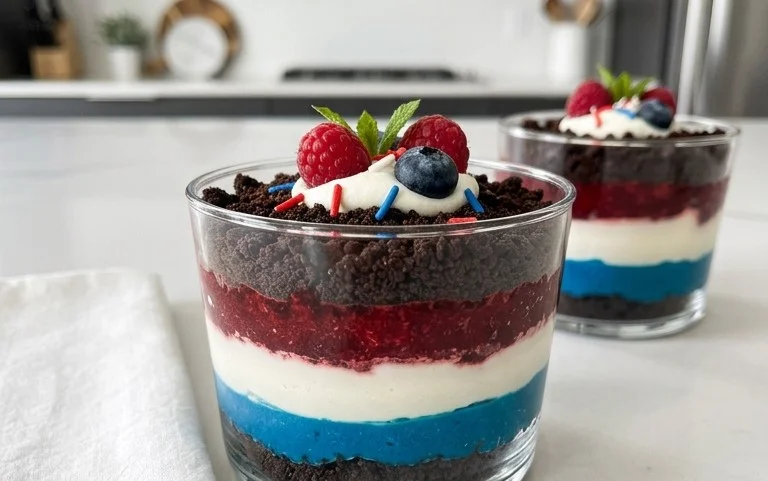
Get ready to celebrate with these incredibly fun and delicious Red, White and Blue Dirt Cups! Perfect for summer holidays like the Fourth of July, Memorial Day, or any occasion that calls for a patriotic treat, these individual dessert cups are a guaranteed crowd-pleaser. They’re not just visually appealing with their vibrant red, white, and blue layers, but they also offer a delightful combination of creamy pudding, crunchy chocolate cookie “dirt,” and chewy gummy worms. Best of all, they are surprisingly easy to make, requiring no baking and minimal effort, making them ideal for even the busiest hosts. Let’s dive into creating these festive delights!
Ingredients:
Crafting Your Festive Dessert
This recipe breaks down into a few simple stages: preparing the pudding, creating the “dirt,” and assembling these delightful cups. We’ll focus on making sure each component is perfect before bringin extractg it all together.
Step 1: Preparing the Cheesecake Pudding Base
The foundation of our delicious dirt cups is a creamy, no-bake cheesecake pudding. In a large mixing bowl, combine the contents of your two cheesecake pudding boxes with the 4 cups of milk. It’s important to use cold milk for the best texture and to ensure the pudding sets properly. Whisk vigorously for about two minutes. You’ll notice the mixture starting to thicken almost immediately. Continue whisking until the pudding is smooth and well combined, with no dry powder pockets remaining. At this point, you’ll want to let the pudding sit for about 5 minutes to allow it to fully thicken. This initial thickening is crucial for achieving that perfect pudding consistency that won’t be too runny when you assemble your cups.
Step 2: Dividing and Tinting the Pudding
Now for the fun part – adding our patriotic colors! After the pudding has thickened, we need to divide it into three equal portions. Use a measuring cup or simply eyeball it into three separate bowls. Take one of these portions and set it aside; this will be our white layer. To the second bowl, add ¼ teaspoon of red gel food dye. Gel food coloring is preferred over liquid because it provides a more concentrated and vibrant color without adding extra liquid that could affect the pudding’s texture. Stir the red dye in thoroughly until you achieve a uniform, bright red color. Repeat this process with the third bowl, adding ¼ teaspoon of blue gel food dye and mixing until a rich blue hue is achieved. Be sure to scrape down the sides of the bowls to ensure all the pudding is colored evenly.
Step 3: Creating the “Dirt” – Crushing the Oreos
No dirt cup is complete without its signature “dirt.” For this, we’ll be using our 19 Oreo cookies. The easiest way to crush them is to place them in a zip-top bag and then use a rolling pin or the bottom of a sturdy glass to break them down into fine crum extractbs. You can also pulse them in a food processor if you prefer a finer texture. We want the crum extractbs to resemble actual dirt, so aim for a mix of finer dust and slightly larger cookie pieces for a more authentic look. Transfer the crushed Oreos to a separate bowl, ready for assembly.
Step 4: Assembling the Red, White, and Blue Layers
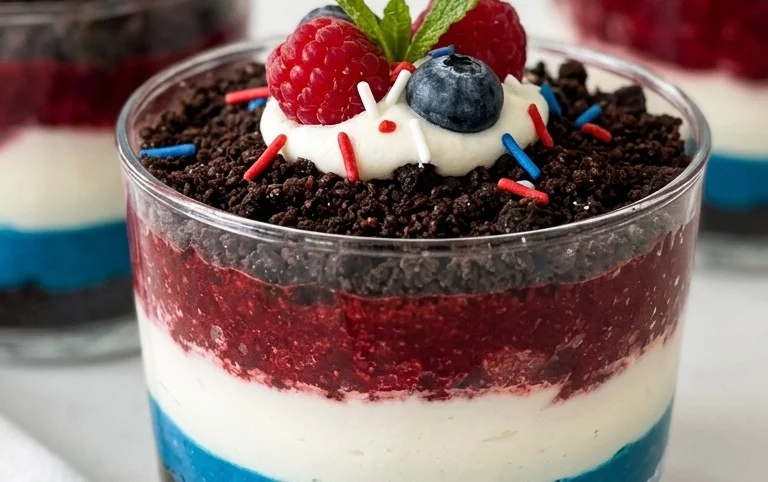
It’s time to bring all our components together! Grab your serving cups. Clear plastic cups or small jars work wonderfully to showcase the beautiful layers. Start by spooning a layer of the white cheesecake pudding into the bottom of each cup, filling it about one-third of the way. Next, carefully spoon a layer of the red pudding on top of the white layer. You can gently spread it with the back of your spoon to create an even surface. Then, add a layer of the blue pudding on top of the red. Again, aim for an even distribution. Between each pudding layer, or on top of the final pudding layer, sprinkle a generous amount of the crushed Oreo “dirt.” Don’t be shy with the “dirt” – it’s what makes these cups so charmingly rustic!
Step 5: Adding the Finishing Touches and Chill Time
To complete our patriotic masterpiece, we’ll add the gummy worms. Gently push a few red and blue gummy worms into the “dirt” on top of each cup, making it look like they are wriggling out of the ground. This is where you can get creative with your worm placement! Once all your dirt cups are assembled, cover them with plastic wrap. It’s crucial to refrigerate these dirt cups for at least 30 minutes before serving. This chilling time allows the pudding to set further and the flavors to meld together beautifully. The cold pudding also helps the “dirt” stay in place. Serve them chilled and watch the smiles appear! These Red, White and Blue Dirt Cups are a simple yet spectacular way to add a festive flair to any celebration. Enjoy!
Conclusion:
I hope you’ve had as much fun learning about these festive Red, White and Blue Dirt Cups as I’ve had sharing them! This recipe is an absolute winner because it’s incredibly easy to assemble, requires no baking, and delivers a huge visual impact. It’s the perfect treat to celebrate any patriotic holiday, from Memorial Day and the Fourth of July to Flag Day. The combination of creamy pudding, crushed chocolate cookies, and vibrant fruit creates a delightful taste and texture experience that kids and adults alike will adore. These cups are fantastic served as individual desserts for parties, barbecues, or even as a fun family activity. You can easily customize them further by adding gummy worms for an extra “dirt” effect or by layering different colors of pudding if you’re feeling adventurous. Don’t hesitate to get creative and make these Red, White and Blue Dirt Cups your own. I truly encourage you to give this recipe a try; you won’t be disappointed by how simple and spectacular it turns out!
Frequently Asked Questions:
What makes this recipe so great for holidays?
This recipe is fantastic for holidays because it’s incredibly simple, requires no cooking, and looks wonderfully festive. The red, white, and blue colors naturally lend themselves to patriotic celebrations, making it an effortless yet impactful dessert choice that appeals to all ages.
Can I make these ahead of time?
Yes, absolutely! You can assemble these Red, White and Blue Dirt Cups a day in advance. Store them covered in the refrigerator. The cookie crum extractbs might soften slightly, but they will still be delicious. Just be sure to add any fresh fruit toppings right before serving to keep them looking their best.
Are there any nut-free variations?
Yes, you can easily make this recipe nut-free. Ensure your chocolate pudding mix and chocolate cookies are certified nut-free. For the “dirt,” you could also consider using crushed gluten-free chocolate wafers or even finely chopped chocolate candies that are free from nuts.
Red, White and Blue Dirt Cups
Festive and fun layered dessert cups featuring creamy cheesecake pudding, crushed Oreos, and red and blue gummy worms.
Ingredients
-
2 boxes cheesecake pudding (3.4 ounces each)
-
4 cups milk
-
19 Oreo cookies (crushed)
-
¼ teaspoon red gel food dye
-
¼ teaspoon blue gel food dye
-
8 red and blue gummy worms
Instructions
-
Step 1
Prepare the cheesecake pudding according to package directions using 4 cups of milk. Divide the pudding into three equal portions. -
Step 2
In the first portion, stir in the red gel food dye until evenly colored. In the second portion, stir in the blue gel food dye until evenly colored. Leave the third portion white. -
Step 3
In the bottom of 8 clear cups or jars, spoon a layer of crushed Oreo cookies to resemble dirt. -
Step 4
Layer spoonfuls of the white pudding over the Oreo crumbs. -
Step 5
Add a layer of the red pudding over the white pudding. -
Step 6
Add a layer of the blue pudding over the red pudding. -
Step 7
Top each cup with more crushed Oreo cookies, then decorate with red and blue gummy worms to resemble worms in dirt. -
Step 8
Chill in the refrigerator for at least 15 minutes before serving.
Important Information
Nutrition Facts (Per Serving)
It is important to consider this information as approximate and not to use it as definitive health advice.
Allergy Information
Please check ingredients for potential allergens and consult a health professional if in doubt.