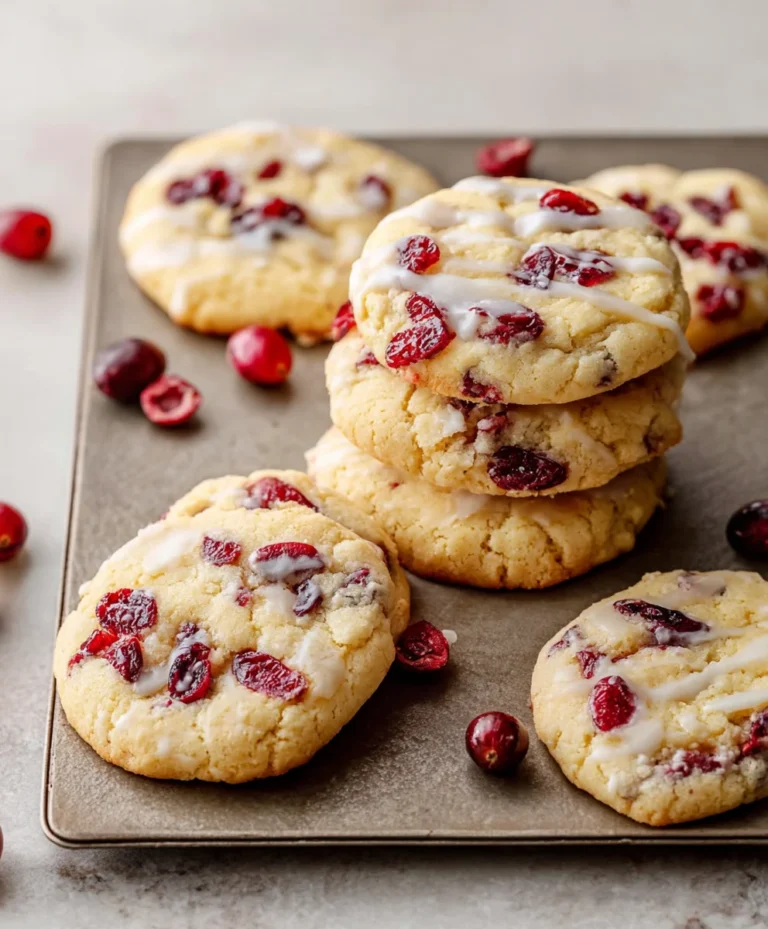
Chocolate Chip Cookie Cheesecake Bliss-Ultimate Dessert
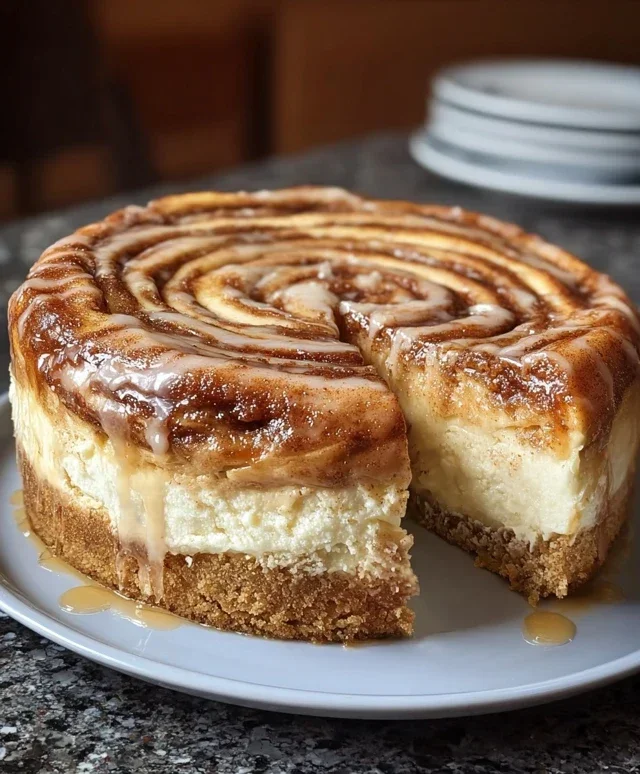
Chocolate Chip Cookie Bottomed Cheesecake. Oh, the sheer brilliance of this dessert! If you’re anything like me, a good cheesecake is a thing of beauty, but a chocolate chip cookie bottom? That’s next-level indulgence. We’re talking about a decadent, creamy cheesecake filling, the kind that melts in your mouth, perched atop a perfectly baked, slightly chewy, golden-brown chocolate chip cookie base. It’s the ultimate mashup of two beloved classics, designed to satisfy every sweet craving imagin extractable. This isn’t just a dessert; it’s an experience. The delightful contrast in textures – the soft, rich cheesecake against the satisfying crum extractble of the cookie – is what makes this Chocolate Chip Cookie Bottomed Cheesecake so utterly irresistible. Get ready to impress yourself and everyone you share this with!
Why We’re Obsessed
The Perfect Fusion
We’re all drawn to the comforting familiarity of a classic chocolate chip cookie and the luxurious indulgence of a perfectly smooth cheesecake. This recipe harmoniously marries these two icons, creating a dessert that’s greater than the sum of its parts. It’s the ultimate treat for special occasions or simply when you need a serious pick-me-up.
Chocolate Chip Cookie Bottomed Cheesecake
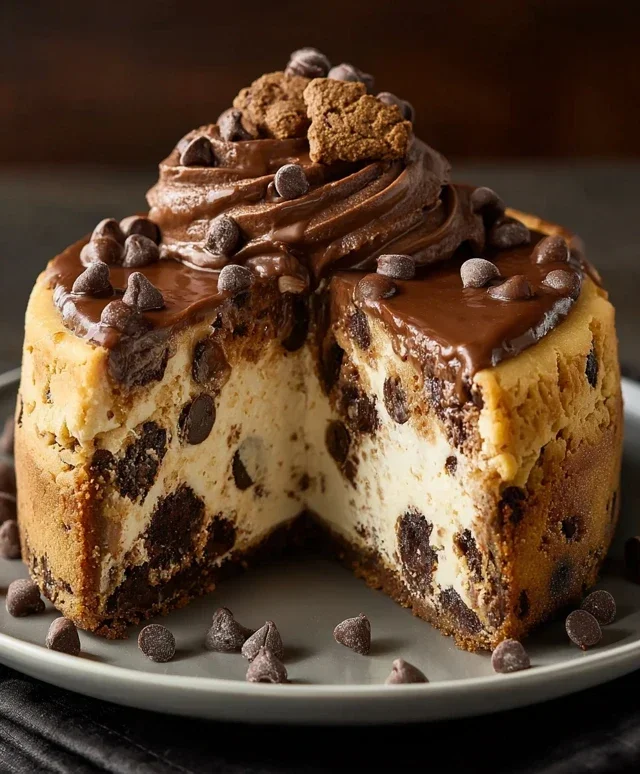
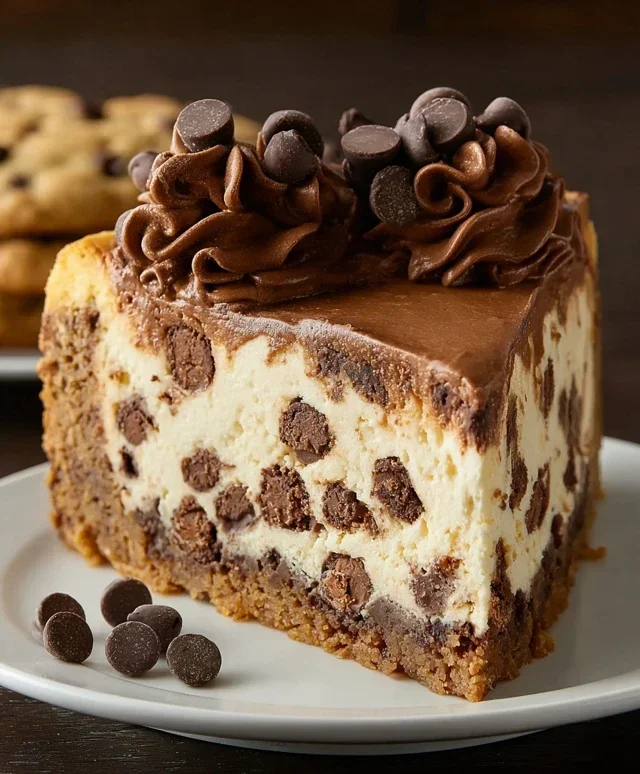
There are few desserts as universally beloved as cheesecake and chocolate chip cookies. What if I told you we could combine the creamy, dreamy indulgence of cheesecake with the irresistible charm of a chocolate chip cookie base? This Chocolate Chip Cookie Bottomed Cheesecake is exactly that – a symphony of textures and flavors where a perfectly baked, slightly chewy chocolate chip cookie forms the foundation for a rich, velvety smooth cheesecake topping, all swirled with extra chocolatey goodness. It’s a showstopper that’s surprisingly achievable, perfect for impressing guests or simply treating yourself to something truly special.
The magic truly lies in the contrast. The slightly crisp edges and soft, chewy center of the cookie base provide a delightful counterpoint to the decadent, smooth cheesecake. And when you incorporate melted chocolate into the cheesecake batter itself, you elevate it from a simple dessert to an unforgettable experience. Don’t be intimidated by making cheesecake; this recipe breaks it down into manageable steps, and the results are so worth it.
Ingredients:
Instructions:
Making the Chocolate Chip Cookie Base
1. First things first, let’s get our oven preheated to 175°C (350°F) and prepare a 23cm (9-inch) springform pan. You can lightly grease and flour the sides of the pan, or line the bottom with parchment paper for easier removal. This step ensures your beautiful cheesecake won’t stick. In a medium bowl, cream together the softened 112g of unsalted butter with the 72g of light brown sugar and 39g of granulated sugar. Beat them with an electric mixer until the mixture is light and fluffy, about 2-3 minutes. This creaming process incorporates air, which will give our cookie base a good texture. Next, beat in the egg and the 1 1/2 teaspoons of vanilla extract until well combined. In a separate bowl, whisk together the 195g of all-purpose flour, 3/4 teaspoon of baking soda, 1/4 teaspoon of baking powder, and 1/4 teaspoon of salt. Gradually add the dry ingredients to the wet ingredients, mixing on low speed until just combined. Be careful not to overmix at this stage. Finally, gently fold in the 211g of semi-sweet chocolate chips. This is where the cookie flavor really starts to shine! Press this cookie dough evenly into the bottom of your prepared springform pan, ensuring it forms a solid, uniform layer. Bake for 12-15 minutes, or until the edges are golden brown and the center is set. Let the cookie base cool completely in the pan on a wire rack. This cooling step is crucial; if you try to add the cheesecake filling to a warm cookie base, it might get soggy.
Preparing the Chocolate Cheesecake Filling
2. While the cookie base is cooling, it’s time to prepare the star of the show: the chocolate cheesecake filling. Ensure your 565g of cream cheese is truly at room temperature. This is non-negotiable for a smooth, lump-free cheesecake. Cold cream cheese will result in a lumpy batter, which we definitely want to avoid. In a large bowl, beat the softened cream cheese with an electric mixer on medium speed until it’s completely smooth and creamy, with no lumps whatsoever. This might take a few minutes, so be patient. Gradually add the 104g of granulated sugar and the 35g of natural unsweetened cocoa powder, continuing to beat until everything is well combined and the mixture is smooth. Make sure to scrape down the sides and bottom of the bowl frequently to ensure all the ingredients are incorporated. Next, beat in the 1 teaspoon of vanilla extract. Now comes the extra chocolatey goodness! Gently fold in the 42g of melted semi-sweet chocolate chips. You can melt these in the microwave in short bursts, stirring between each interval, or use a double boiler. Once the melted chocolate is incorporated, the filling should have a beautiful, rich chocolate hue. Don’t overmix once the melted chocolate is added; we just want it evenly distributed.
Assembling and Baking the Cheesecake
3. Once your cookie base has cooled completely, it’s time to assemble. Carefully pour the chocolate cheesecake filling over the cooled cookie base. Gently spread the filling evenly with a spatula, making sure it reaches all the edges of the pan. For an extra touch of elegance and flavor, you can dollop some additional melted chocolate (if you have any leftover) or even some chocolate ganache on top and swirl it gently with a toothpick or skewer. This creates beautiful marbling. Now, it’s time to bake, and we’ll use a water bath, also known as a bain-marie. This is an important step for cheesecake as it helps the cheesecake bake evenly and prevents cracking. Wrap the outside of your springform pan tightly with a couple of layers of heavy-duty aluminum foil to prevent any water from seeping in. Place the foil-wrapped pan inside a larger baking pan, such as a roasting pan. Carefully pour hot water into the larger baking pan until it comes about halfway up the sides of the springform pan. This creates a humid environment for the cheesecake to bake.
4. Carefully place the entire water bath setup into your preheated oven. Bake at 165°C (325°F) for approximately 50-60 minutes. You’ll know the cheesecake is ready when the edges are set, but the center still has a slight wobble. It should look mostly firm, not liquid. Do not overbake, as this can lead to a dry cheesecake. Once baked, turn off the oven and leave the cheesecake in the water bath, with the oven door slightly ajar (you can prop it open with a wooden spoon), for about an hour. This gradual cooling process helps prevent cracking. After an hour in the oven, carefully remove the cheesecake from the water bath and remove the foil.
5. The final, and arguably most important, step is chilling. This is where the cheesecake truly sets and develops its signature creamy texture. Let the cheesecake cool at room temperature for another hour or so, then cover it loosely with plastic wrap and refrigerate for at least 6 hours, or preferably overnight. This extended chilling time is essential for the cheesecake to firm up properly. When you’re ready to serve, carefully run a thin knife around the edge of the pan before releasing the springform sides. Slice with a sharp knife dipped in hot water and wiped clean between each cut for the neatest slices. Enjoy this incredible fusion of cookie and cheesecake!
Conclusion:
I hope you’re as excited to bake this Chocolate Chip Cookie Bottomed Cheesecake as I am to eat it! This recipe truly delivers a delightful combination of textures and flavors. The rich, creamy cheesecake filling perfectly complements the sweet, slightly chewy chocolate chip cookie base. It’s a guaranteed crowd-pleaser that’s surprisingly approachable, even for begin extractner bakers. Imagin extracte the pure bliss of that first bite – a harmonious blend of decadent cheesecake and comforting cookie! This dessert is fantastic served chilled, allowing the flavors to meld beautifully. I love pairing it with a simple raspberry coulis or a dollop of fresh whipped cream for an extra touch of elegance. Don’t be afraid to experiment with variations either! Consider adding mini chocolate chips to the cheesecake batter, or perhaps a swirl of caramel for a salted caramel twist. No matter how you make it, I strongly encourage you to give this Chocolate Chip Cookie Bottomed Cheesecake a try. It’s an unforgettable dessert experience waiting to happen!
Frequently Asked Questions:
Can I make this cheesecake ahead of time?
Absolutely! This cheesecake is actually best made a day in advance. Chilling overnight allows the flavors to fully develop and the cheesecake to set perfectly. Just cover it tightly with plastic wrap and refrigerate.
What kind of chocolate chips should I use?
Semi-sweet chocolate chips are my go-to for this recipe as they strike a lovely balance between sweet and slightly bitter. However, feel free to use milk chocolate or dark chocolate chips depending on your preference. You could even mix them up!
My cheesecake has cracks. Is it ruined?
Not at all! Cracks in cheesecake are usually caused by overbaking or rapid temperature changes. While it might not look as aesthetically perfect, the taste will be just as delicious. You can easily disguise minor cracks with toppings like whipped cream or fruit!
Chocolate Chip Cookie Bottomed Cheesecake
A decadent cheesecake with a rich chocolate chip cookie crust, swirled with cocoa and topped with melted chocolate.
Ingredients
-
112g unsalted butter, room temperature
-
72g light brown sugar
-
39g sugar
-
1 egg
-
1 1/2 tsp vanilla extract
-
195g all-purpose flour
-
3/4 tsp baking soda
-
1/4 tsp baking powder
-
1/4 tsp salt
-
211g semi-sweet chocolate chips
-
565g cream cheese, room temperature
-
104g sugar
-
35g natural unsweetened cocoa powder
-
1 tsp vanilla extract
-
42g semi-sweet chocolate chips, melted
Instructions
-
Step 1
Preheat oven to 350°F (175°C). Grease and flour a 9-inch springform pan. -
Step 2
For the cookie crust: In a bowl, cream together softened butter, light brown sugar, and sugar. Beat in the egg and vanilla extract. -
Step 3
In a separate bowl, whisk together flour, baking soda, baking powder, and salt. Gradually add dry ingredients to wet ingredients, mixing until just combined. Stir in 211g chocolate chips. -
Step 4
Press the cookie dough evenly into the bottom of the prepared springform pan to form the crust. -
Step 5
For the cheesecake filling: In a large bowl, beat cream cheese and sugar until smooth. Beat in the cocoa powder and 1 tsp vanilla extract. -
Step 6
Gently spread the cheesecake filling over the cookie crust. -
Step 7
Bake for 55-65 minutes, or until the edges are set and the center is slightly jiggly. -
Step 8
Turn off the oven, crack the door open, and let the cheesecake cool in the oven for 1 hour. -
Step 9
Remove from oven and let cool completely on a wire rack. Chill in the refrigerator for at least 4 hours. -
Step 10
Drizzle the melted chocolate chips over the top before serving.
Important Information
Nutrition Facts (Per Serving)
It is important to consider this information as approximate and not to use it as definitive health advice.
Allergy Information
Please check ingredients for potential allergens and consult a health professional if in doubt.